Tips for Interior Design
As I am the author of the only Revit textbook focused on Interior Design, Interior Design Using Autodesk Revit 2019 , one could say the topic is near and dear to my heart! In this article I would like to share several tips and some tricks anyone can use to create amazing interior graphics.
To emphasize how easy Enscape is to use, I created a custom design using a sample project, just for this article. The design effort and graphics all took about 8 hours to create. Using competing contemporary software and workflows, the rendering effort alone would likely take this same amount of time, including static post-production efforts.
By the way, some elements in the design were manufacturer-created and downloaded or borrowed from another project, and other elements are completely custom. I created the bookcase and rolling library ladder and downloaded several elements from BIMobject .
While not meant to be a dramatization, we will discuss a few ways to go from the descriptive image on the left to the emotive one to its right. Considering lighting , materials and entourage , to name a few fundamental elements, goes a long way in creating amazing, dynamic and easy to update graphics while fully engaging in the design process.

Comparison between two renders; descriptive (left) and emotive (right)
The big picture
Let’s take a moment to review and understand our featured image, which depicts a high-end publisher’s office. We are in a spacious urban location with an exposed structural slab, mechanical systems and floating ceiling above. The space is encompassed by a large expanse of glazing, which lets in a lot of daylight. Even with plentiful daylight, there is still an electric lighting need, for work tasks and accents. Sample inventory is featured in an expansive custom bookcase complete with a rolling ladder. Finally, several darker materials help to balance the massive amounts of daylighting and set the atmosphere desired by the client, which were revealed through several visual-listening meetings and correspondence.

Highly developed final render
With the goals of the project in mind, we want to emphasize the needs of the project and client while not letting the software or technology slow us down, or worse, dictate the outcome.
Turn on the lights
Good lighting cannot be overemphasized. As such, I am excited to be presenting later this year on professional lighting design at the AIA-Minnesota Convention 2018 in Minneapolis. I also presented on this topic at the world’s largest conference on architectural lighting; Lightfair 2018 in Chicago. Architects and interior designers have some amazing tools with which to design, study and analyze both daylight and electric lighting.
A good interior lighting solution is not always easy to depict in a computer-generated illustration. Too often, lighting is underwhelming or faked in architectural renderings. But, with a physically-based rendering engine such as Enscape, we can get closer to reality without needing to add fake or hidden area lights and make time consuming post-production edits in Photoshop (or a similar image editing program). When using the techniques mentioned here and in the next section on materials, quality lighting helps set to overall tone of the scene. And, if the image seems off, it just might mean the lighting design needs to be reconsidered, not that the rendering needs superficial adjustments.
It is worth noting that the electric/artificial lights are always on in Enscape. However, in some cases the brightness of the daylight washes them out.
The image below shows our Revit scene with the Light Source sub-category turned on to reveal all sources of artificial lighting. I prefer to use accurate photometric light sources (IES files) whenever possible. They are not only used by Enscape, but also by professional lighting analysis tools like ElumTools to do point-by-point illuminance calculations. However, sometimes they are not available for a specific luminaire or do not produce the expected results, in which case the built-in Revit light sources can be used. Our sample project uses photometry for the two pendent lights and Revit’s ‘spot light’ for the rest.

Light sources exposed in the Revit view
The following image is missing several lighting elements which are part of the design. Thus, the image is not as dynamic or lively. Missing, as well, are hot spots on the bookcases and visible light sources from those same fixtures. A quick search online revealed several ready-to-use Revit families; this included the family file (RFA file), a type catalog (TXT file) and, in some cases, photometry data (IES file). The type catalog is saved in the same folder as the family file, and when the family is loaded (via Revit’s Load Family command) we are presented with all the predefined options for that specific model, such as standard lengths, luminous flux and power requirements.

Example of missing light fixtures
For the family I decided to use, I also modified the family for two things: to add a visible light source and include a void so the face-based family cuts the surface it is placed on (see two images below). Some light sources can have ‘emit light from source’ checked, and this spot light from point cannot. So, I created a self-illuminating material and painted it on the inside housing (I made the shade an orange color so it would be clear what was painted).
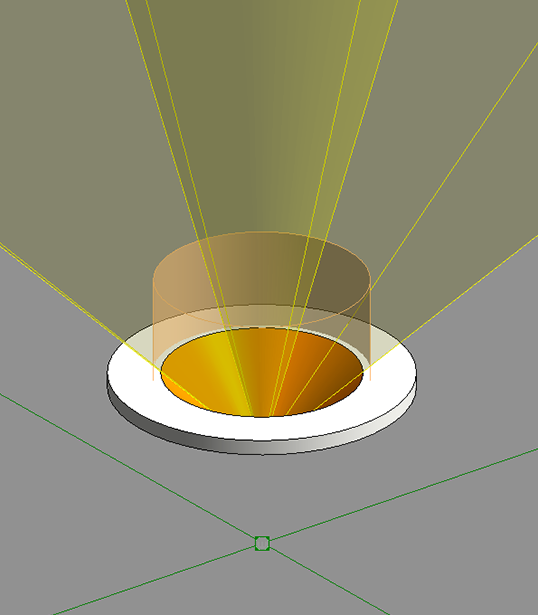
Revit light fixture family

Material with self-illumination
The difference may be subtle but can be clearly seen in the follow images: in one you see the light source and the other you do not. In both cases we benefit from the light emitted from the fixture. Notice, the color temperature of the light is also defined via Revit’s Initial Color parameter, with the value being measured in kelvin (e.g. 3000k).

Light source not visible
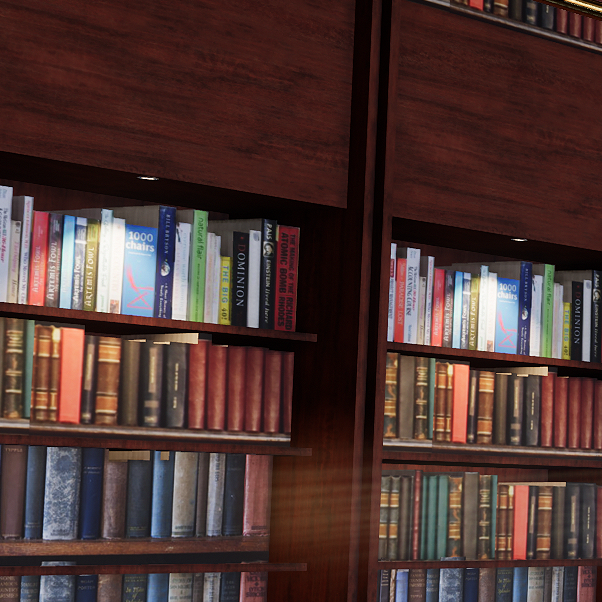
Light source visible
Develop materials
Materials should be developed for the project and not to fit the lighting scheme or rendering engine. Let’s not let technology dictate our design! To that end, use the advanced materials in Revit 2019, create your own or develop similar quality materials using Enscape’s Material Editor. In the Revit 2019 material editor, notice there are four images used to define albedo , roughness, bump and reflections.
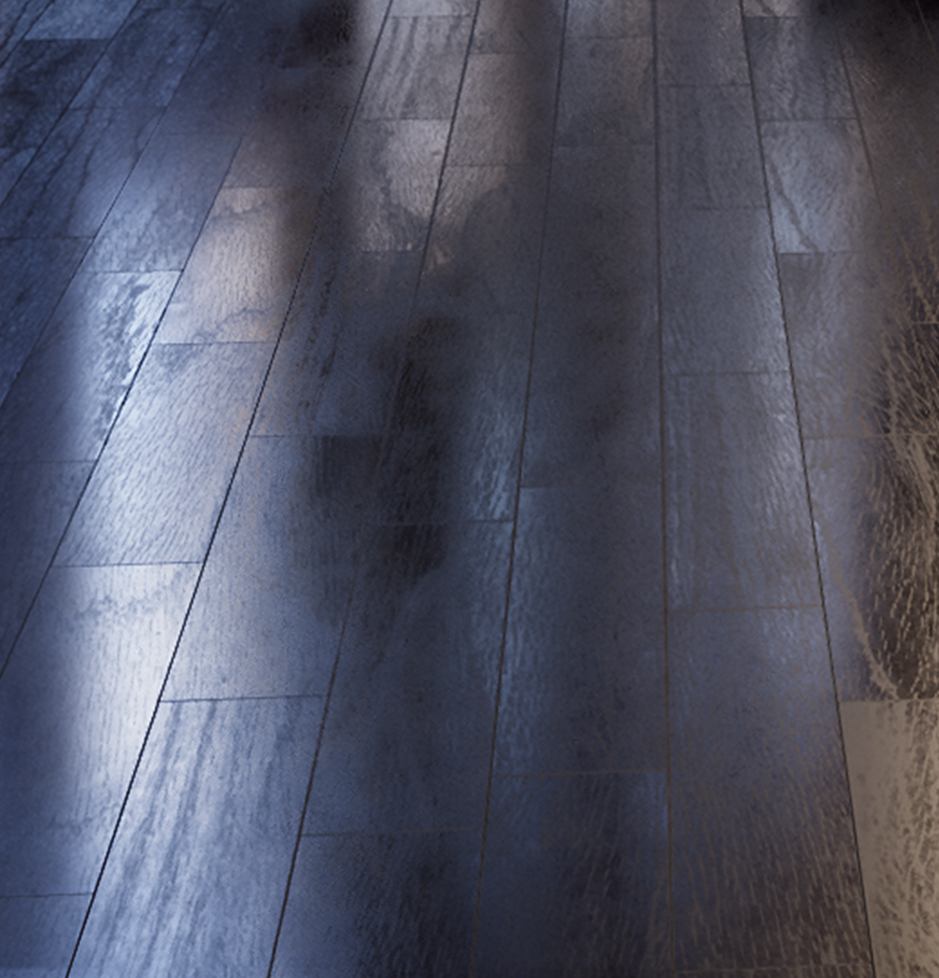
Advanced Revit material
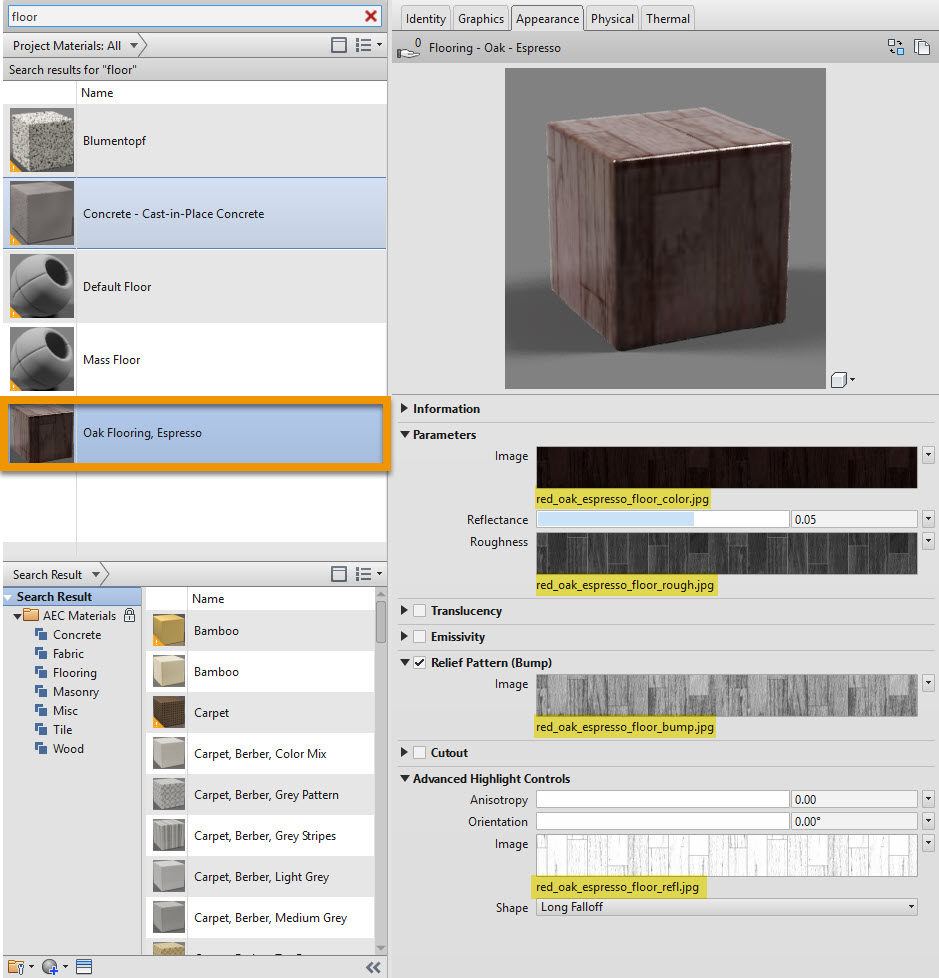
Advanced material settings
To see the level of realism added, you can compare the texture with the traditional Generic Revit material shader. It’s a world of difference in Enscape. It is the same texture and scale but lacking the roughness, bump and reflection definition.
Material orientation is also important in the creation of a natural feeling graphic. The default orientation of the wood grain, for example, may not be ideal in all cases. For instance, the panels between the lower and upper bookcases may look best if the grain is rotated ninety degrees – compare the two images below.

Default material orientation
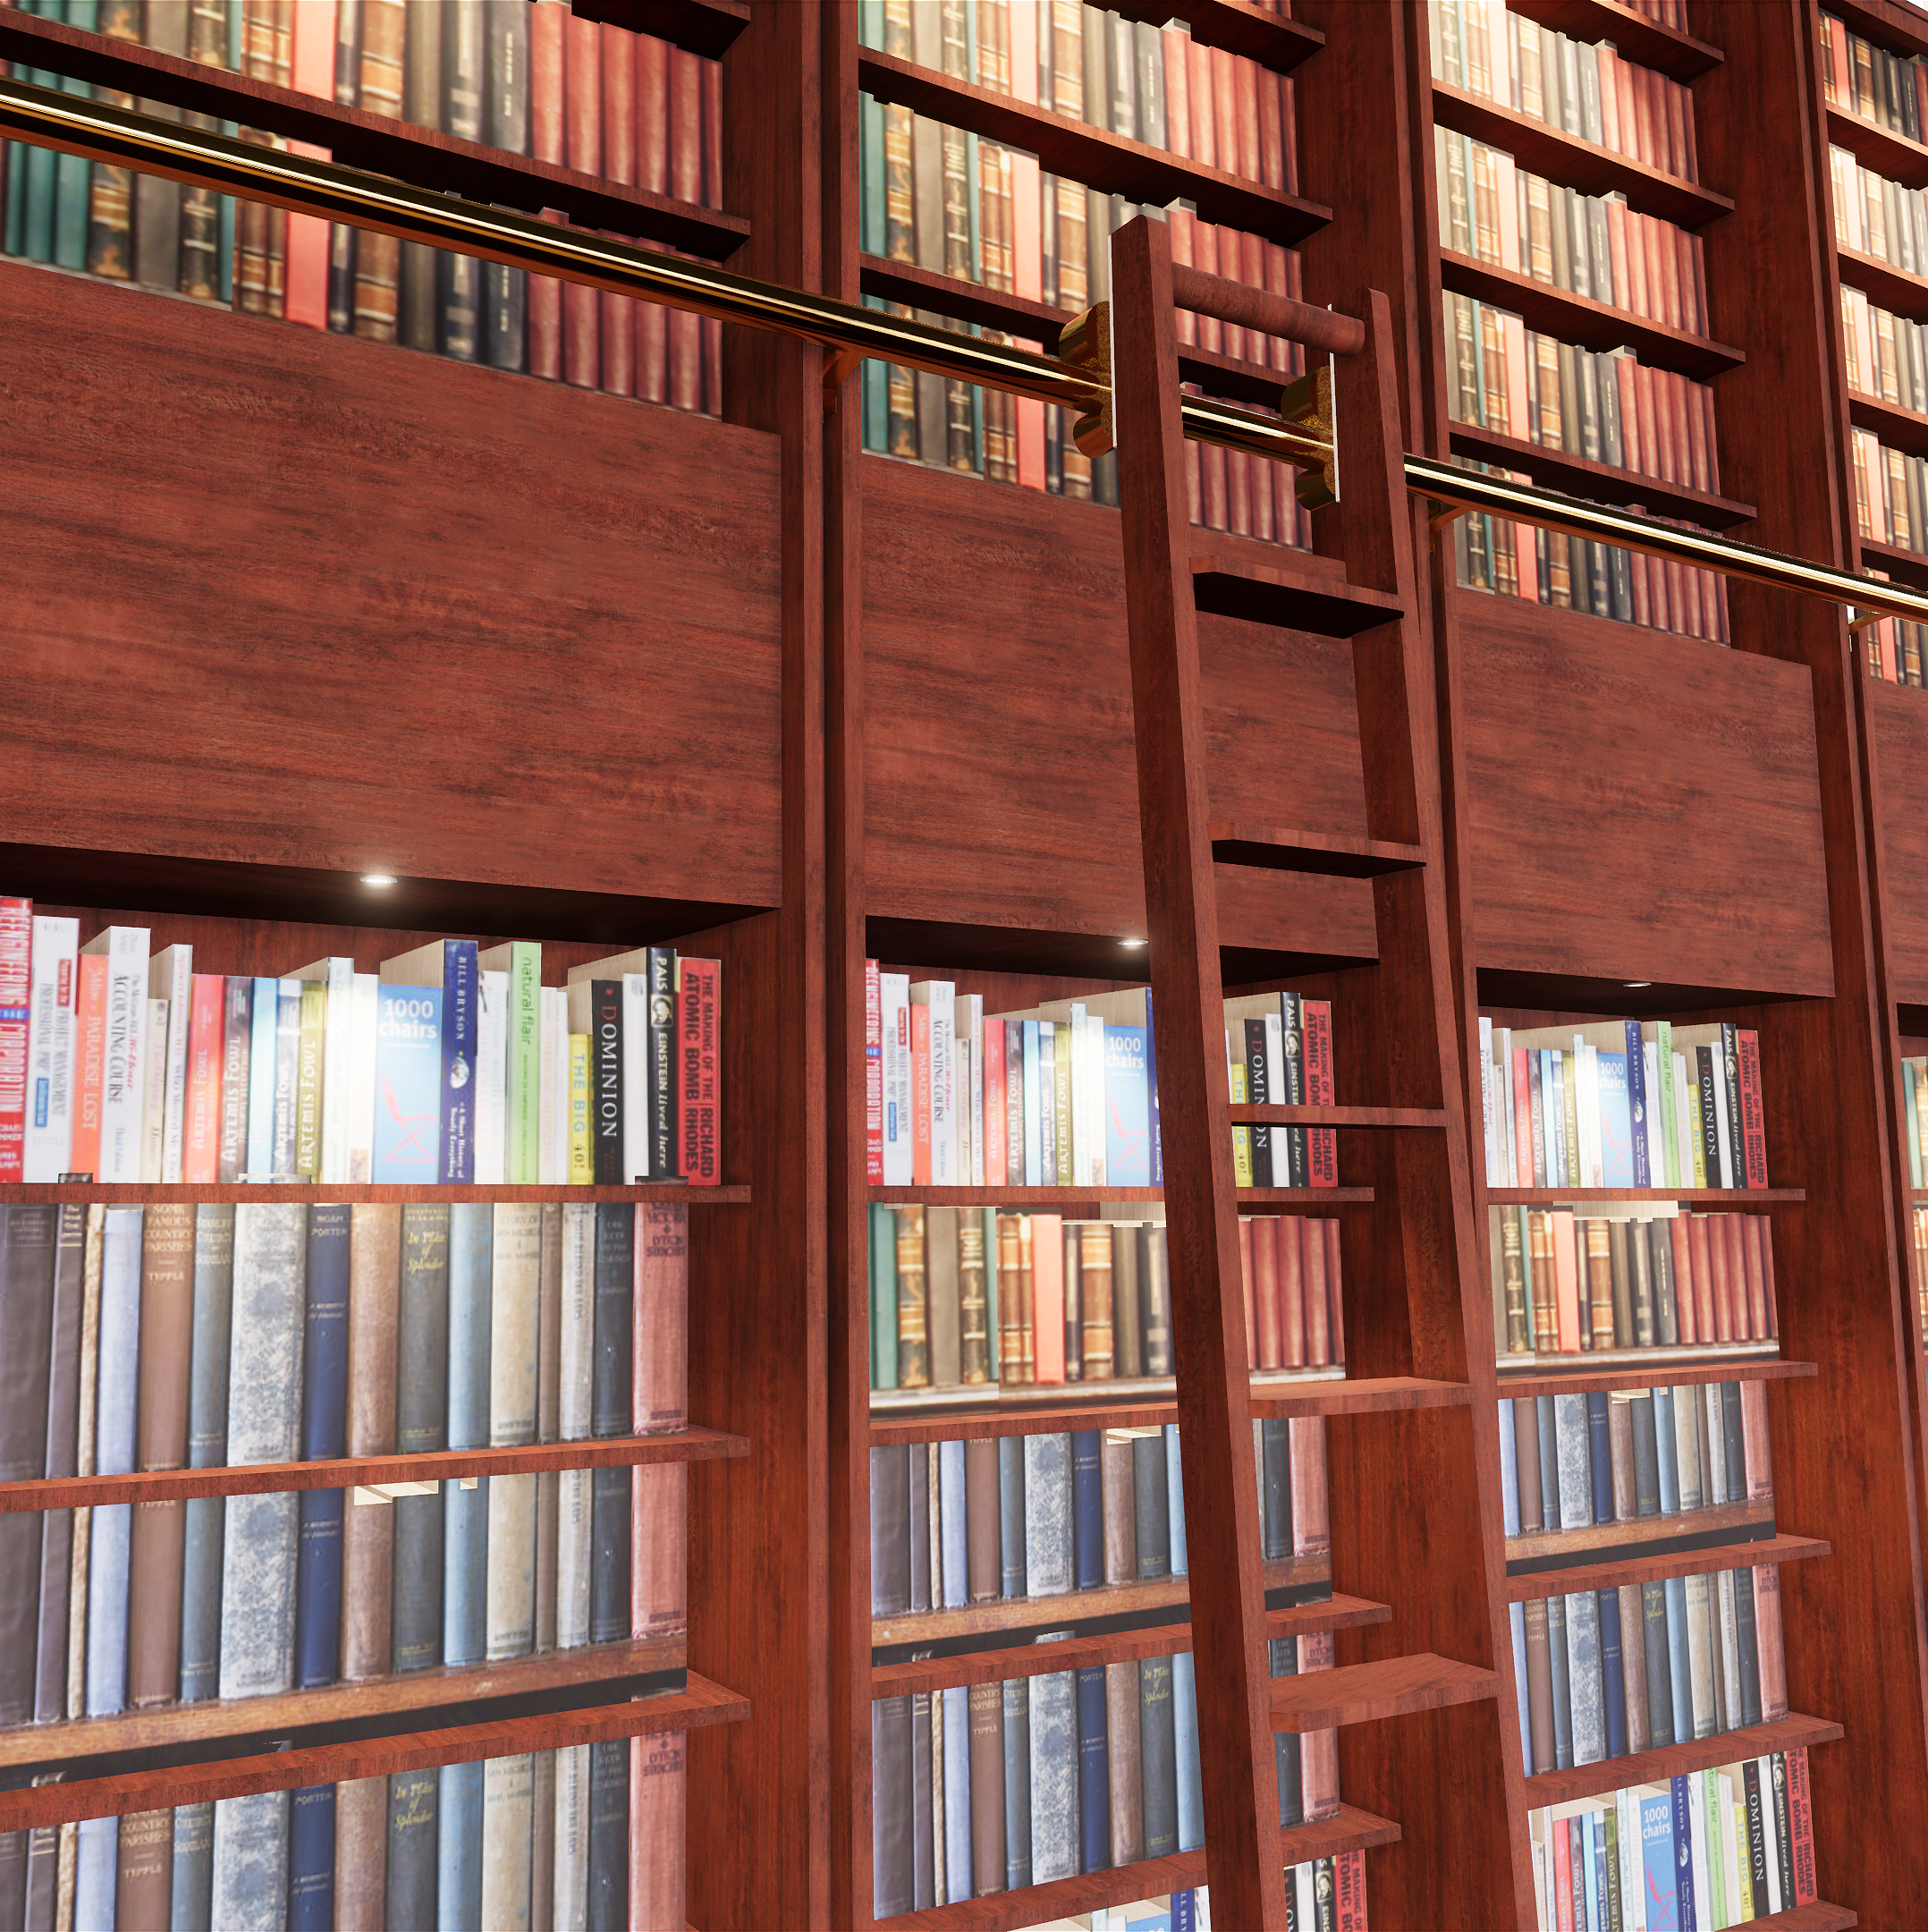
Modified material orientation
In Revit, it may not always be obvious how to rotate a material, especially when there is no model pattern applied to the objects surface. But that is the key: apply a model pattern, tab to select it and rotate it. When a model pattern is rotated, the texture is also rotated. Once positioned, the model pattern can be changed with another which has a large spacing, so it does not appear in construction drawings (but you cannot remove the model pattern, as the texture will reset).
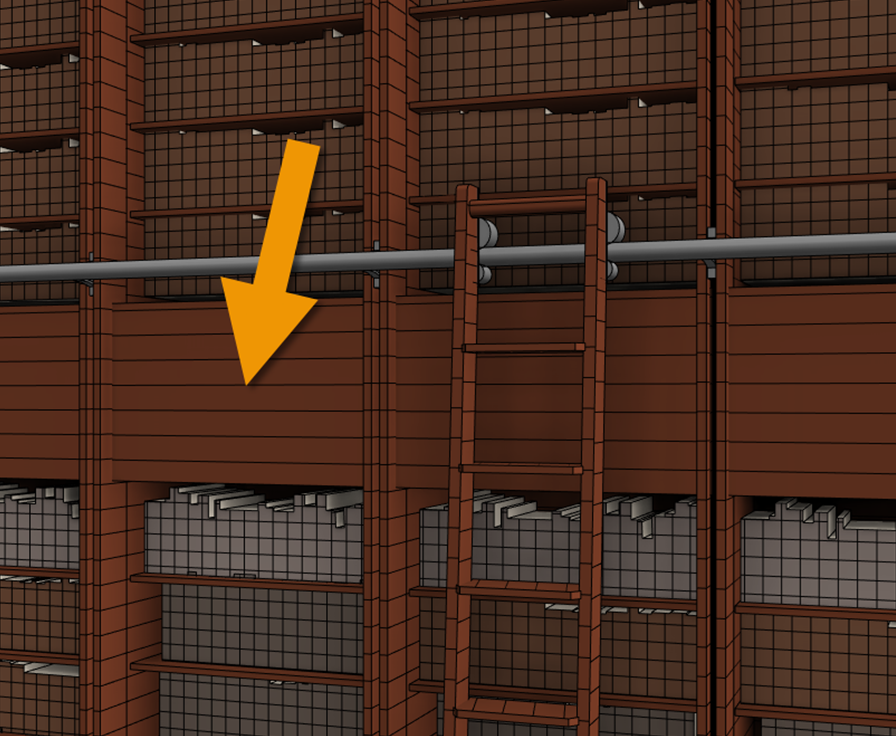
Model pattern can be selected and rotated
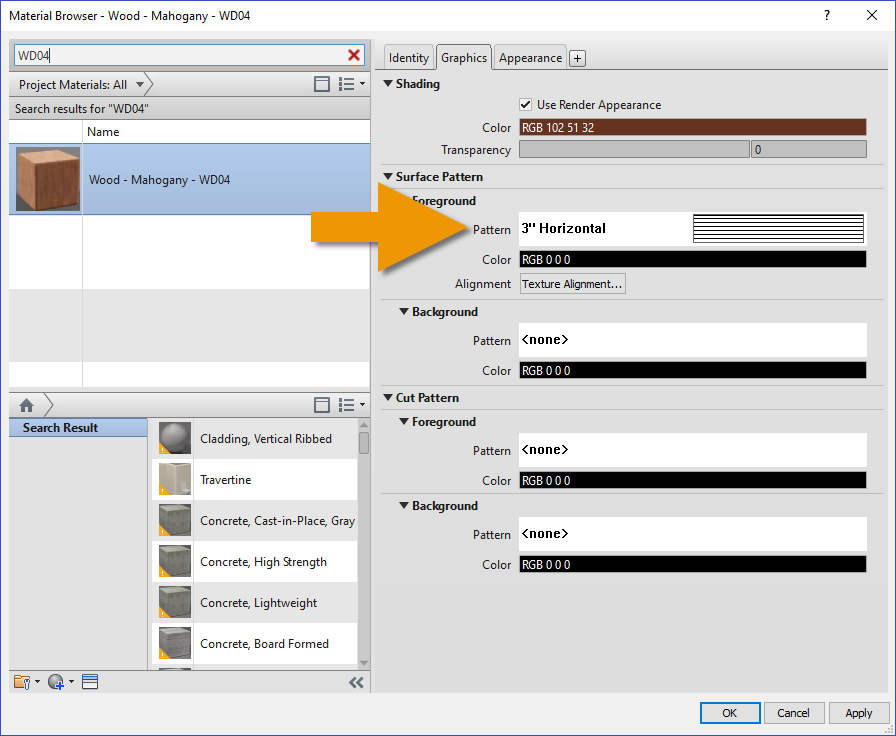
Model pattern applied to material
Entourage, entourage, entourage
Architecture is for people, and people help define scale in an architectural presentation. Adding them in Revit is easy, especially if you have the ArchVision subscription, create custom RPC’s or own some of the AXYZ premium content. In the image below, I used one AXYZ (on right), one custom 3D (me, on the left) and one custom 2D RPC (my friend Jon Rose at the desk). Not only are they easy to add in Revit, compared to post-processing in Photoshop, you can capture any number of angles (like the two extra ones shown here).

Fully 3D Custom and professional RPC examples
In the image above, you can also see a reflection of the person on the television screen. And below, notice the shadow cast on the person and by the person; normally I would move the person or adjust the lighting, but to make this point I did not. All of this would take a lot of extra time in post-processing and if you are not a “Layers” expert in Photoshop, design changes are often avoided to limit the amount of rework required – especially if the vantage point or perspective changes.
There are many ways to create your own content; I discuss a few of them in this article about Custom RPC Content in Enscape .

Custom 2D RPC example with adjusted depth of field
View the composition
With all the concepts previously discussed in this article applied to your project, view composition is literally a joy. This is where all your thoughtful work pays off. It is very easy to get carried away with the number of views and combination of settings , possible to create an array of provocative images ! I find the best workflow is to compose a view in Escape and then save the view back to Revit, rather than trying to compose the view in Revit first.
Be sure to set the Enscape-created view to Fine for level of detail in Revit. Also, the cropped view created by Enscape may not have the same ‘field of view’ but the Enscape view will match the original view composition as long as the Enscape settings have not been changed.

View composed in Enscape and then saved back to Revit
Conclusion
The thoughtful use of lights, materials and model-based entourage can transform a descriptive image into an emotive graphic that will surely resonate with your clients and project stakeholders. Not to mention the freedom to improve the design without the worry of massive rework of your presentation materials.
Enscape empowers interior designers and architects to validate their design ideas as they design. It also facilitates a deeper sense of client comprehension. As I have mentioned in several previous posts, Enscape can produce amazing results with minimal energy. But with a little extra effort and understanding of the tools and techniques, the results can be simply breathtaking!
Hopefully this article has inspired you to take your architectural visualizations to the next level in significantly less time, now that it can be done with such ease in real-time!

Dan Stine
He is an Author, Blogger, Educator,
BIM Administrator and Wisconsin registered architect.
He works full-time at LHB – a 250 person full-service design firm.
He is an Author, Blogger, Educator,
BIM Administrator and Wisconsin registered architect.
He works full-time at LHB – a 250 person full-service design firm.
LinkedIn – https://www.linkedin.com/in/danstinemn