Sun, Geolocation, and Time of Year
Sun, Geolocation, and Time of Year
Overview
The sun can have a dramatic effect on your project’s look and feel. Additionally to being able to quickly adjust the sun directly in the Enscape window, Enscape can also interpret the Geolocation and Time of Year settings from Sketchup for the sun to be positioned correctly. You can quick adjust the sun settings in Enscape by using various key combinations listed below.
Time of day – Press U or I to adjust the time of day. Alternatively, you can also use Shift + Right Mouse Button while dragging the mouse right or left.
Solar angle – Press Shift + U or I to adjust the Solar angle.
Solar rotation – Press Ctrl + U or I to adjust the Solar rotation.
Reset Sun Position – Press the Home key to reset modifications made to the sun position.
Generally speaking the Sun Settings and Geolocation are adjusted in Sketchup, and the Geolocation will affect the position of the Sun when adjusting the time of year. You can also, adjust the time of day in the Enscape window and save those settings for each view.
Adjust the Sun and Geolocation in SketchUp
Once the Shadows and Location Toolbars are enabled in SketchUp, you will see the Shadow Toolbar now.
The Shadow Toolbar allows you to alter the Time of Year and the Time of Day in your project by adjusting the two sliders.
To save the Sun Position to a Saved View you will need to use SketchUp’s Update Scene option, as explained here.

SketchUp Shadows Toolbar
To adjust the Geolocation, you can either access the settings via the Sketchup File -> Geo-location -> Add Location menu option, or via the SketchUp Window -> Model Info menu option.

SketchUp Add Location Option

SketchUp Model Info
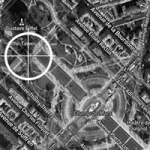
This will open the SketchUp Model window, where you can click on Add Location (which is the same as selecting Add Location from the Sketchup File menu option described above), or Set Manual Location. In the Add Location window, you can either use the search function to enter an address or coordinates, or you can drag and zoom the map to the location you require. Once the general location has been decided upon, you can then click on Select Region which will display a bounding box of the area to use.

SketchUp Model Info Window

Select Region
Once you are happy with setting the area you want to use, click the Import button at top right of the Add Location window which will close the Add Location window. This will then display the specified area as the location for your project.

Import Location

GeoLocation Applied to Project