Custom Skybox in Enscape
More and more clients are coming to expect high quality graphics to represent their multi-million-dollar projects. Luckily the team at Enscape is hard at work, making this task unbelievably easy. From realistic textures, to entourage & clutter, and even allowing you to wrap your project in the real world. That’s right, even though Enscape comes with great backgrounds, it is possible to create custom skyboxes for your projects.
It used to be that a custom 3D background was only possible using an HDRI file, and this is still true for many other rendering programs. And, while Enscape still supports that format, it can also use a simple JPG/PNG photosphere image (with some format limitations).
This article will walk you through the steps of creating an amazingly realistic custom background for your project using Enscape. Keep in mind that the same process applies to Revit, Rhino, SketchUp and ArchiCAD.
HARDWARE
There are several ways to create a photosphere image to use as a skybox in Enscape; you can even create one from most smartphones. For this article I used two 360° photosphere cameras: GoPro Fusion and RICOH Theta S, as pictured below on my super-sized Enscape mouse pad! The showcased cameras are only two examples; you can use any 360° photosphere camera that produces images in the aspect ratio 1:2 (horizontal) 3:4 /4:3 (cross) as detailed in the Enscape help topic link at the end of this article.
The Ricoh camera is the easiest to use, as it mounts to a common tripod and its raw images can be used directly in Enscape. However, it only takes HD/1080 images, which are not great for a 360-photosphere image. The GoPro camera has an unusual mounting system and the images must be “rendered” in the GoPro Fusion Studio software to get them in the correct format for Enscape. But the results are better as the image is shot in 5.2k quality. Both cameras also take Photosphere video as well, but Enscape does not currently support that.

Photosphere Cameras: Two Photosphere Cameras Tested
Pictured below is one of the sample sites I chose for this article, which is a city-owned park juxtaposed to the harbor of the world’s most inland port in Duluth, Minnesota (USA), where I live.

Proposed Project Site
Pictured next is the Richo Theta S mounted on a tripod in the center of the site. This is a rather tall tripod; about seven feet (2133 mm) tall. The catch here is that nearly all views from within your building will have the same exterior view (i.e. from the 2nd floor and the 20th floor). For a taller building, you would have to get the photosphere from a drone. Then, the skybox can be changed depending on the current location in the building.

Richo Theta S Mounted on Tripod
Here is an example comparing the quality between the two cameras. The Theta S image is about 4 MB versus the Fusion being about 15 MB.
 vs. GoPro Fusion (right)")
Richo Theta S (left) vs. GoPro Fusion (right)
Here is an example of the image being prepared in GoPro’s Fusion Studio, and then rendered to a rectangular, flat-Earth-map, type image.

Desktop Software to Process GoPro Video and Images
We will use the GoPro Fusion camera results for this first example. The following image is from the same tripod location shown previously. Both cameras allow the image to be taken remotely via an app on your mobile device. However, for both cameras, it is not possible to get far enough away, at this site, to avoid being pictured in the image.

Raw Photosphere Result
Thus, a helpful tip is to quickly move to another location, relative to the un-moved tripod, and take another picture. I say “quickly” so the clouds or any people who might be in the background do not move too much.

Second Photo Where I Quickly Moved to Another Spot
Now that we have two images, lets take them into Photoshop. We will place each image on its own layer, as shown here.

Combine Two Images in Photoshop, Each on a Layer
Notice the top layer is turned off here.

Background Layer Shown
On the top layer, simply use the eraser tool to remove the photographer (i.e. me). I like to have the eraser set to have soft edges to help blend any difference between the two images.
")
Foreground Layer with Erased Areas (where I was standing)
The result looks like this, but we still have the tripod and its shadow shown in the frame. So, I select this area using the Photoshop’s Laso tool and then press the Delete key. Per the dialog shown below, I use the Content-Aware feature to automatically fill in the deleted area to match its surroundings.

Laso Select Tripod and Shadow; Use Content-Aware Delete
And here is our final, Enscape-ready image!

Final Result, Enscape Ready!
Now, in Enscape we open the Enscape Settings dialog, check Load Skybox from File and then browse for this custom file I just created. Use the Rotation slider as needed to properly align the background with your model.

Select Custom Skybox File
The results are amazing! Hover over the image to see the effect from changing the time of day within Enscape. Notice the sun shows up through the skybox.
Enscape Generated Rendering with Time of Day Adjustments (Mouseover for Change)
I always say that reflections on a material are useless unless they are reflecting something, and preferably something real.

Skybox Reflection in Glazing
The Depth of Field also works well with a custom skybox. Hover your cursor over this image to see it change.
Depth of Field Adjustment Example (Mouseover for Change)
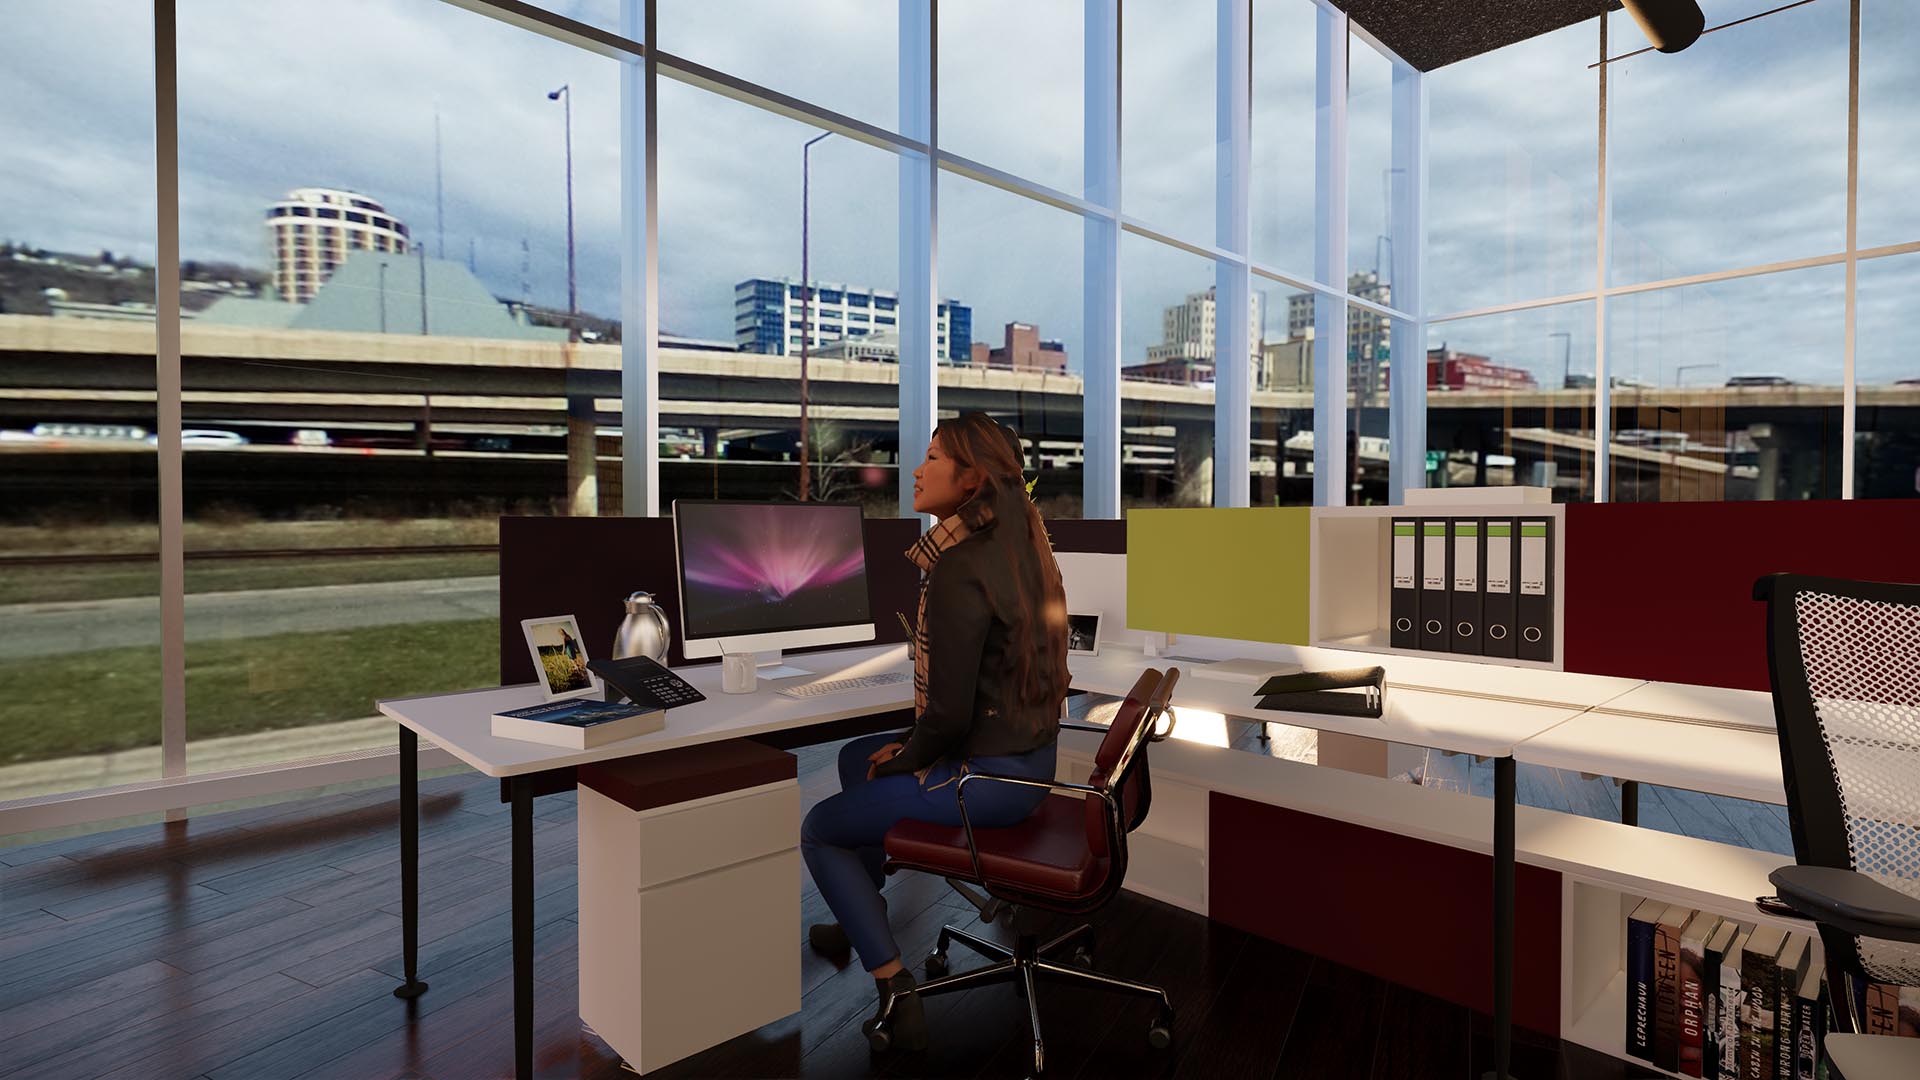
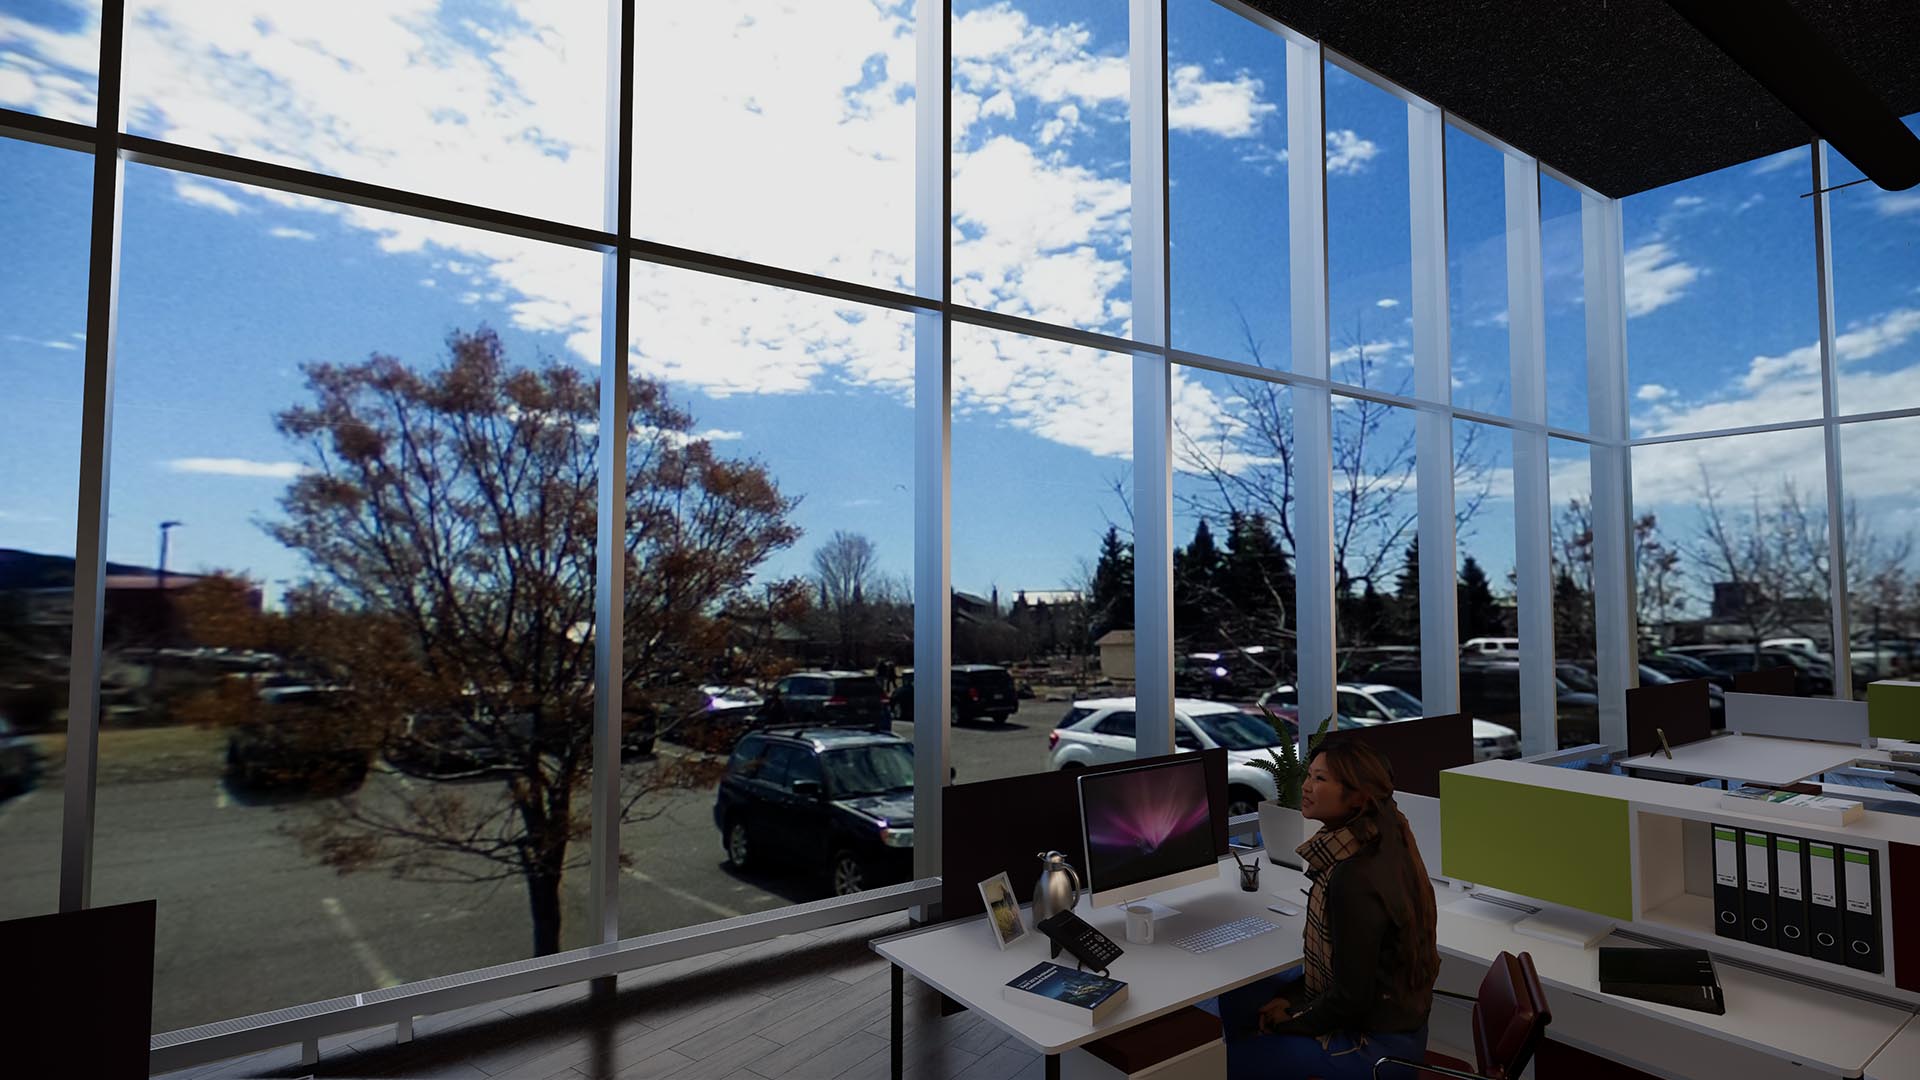
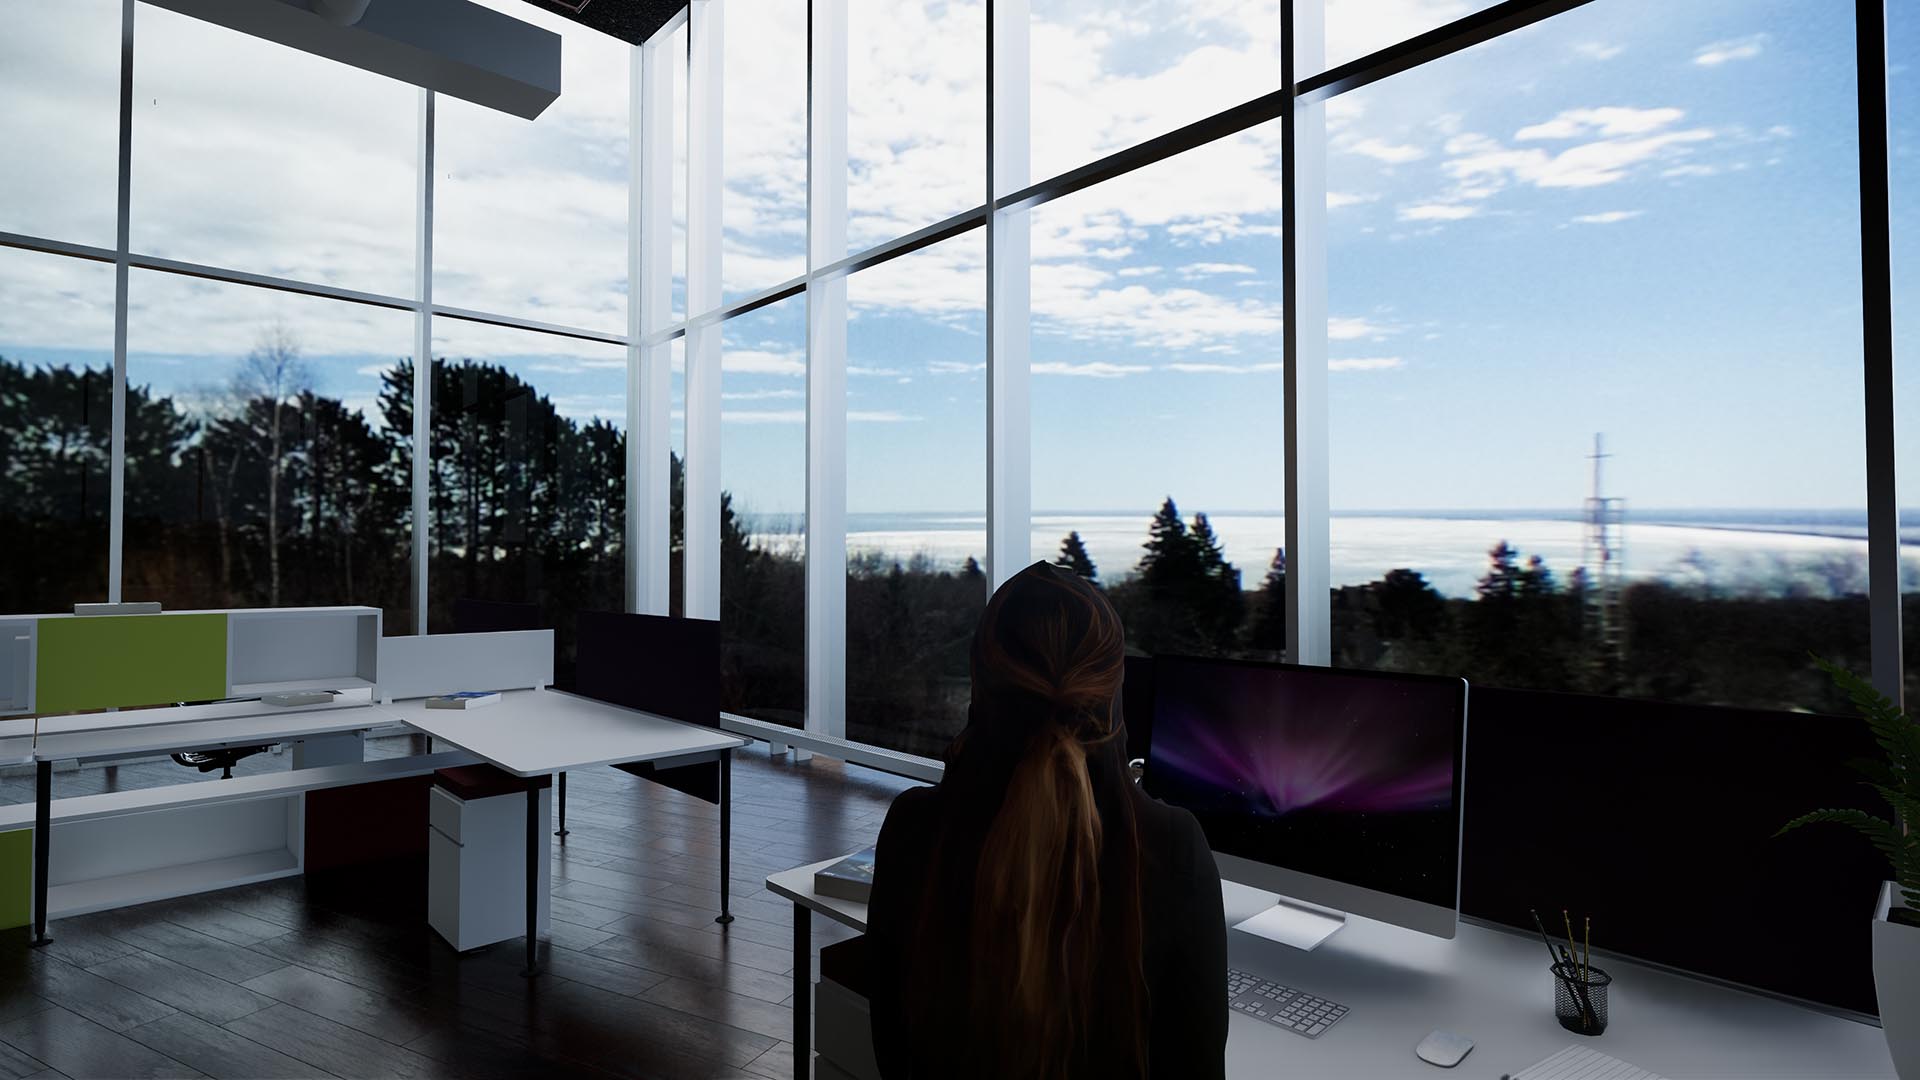
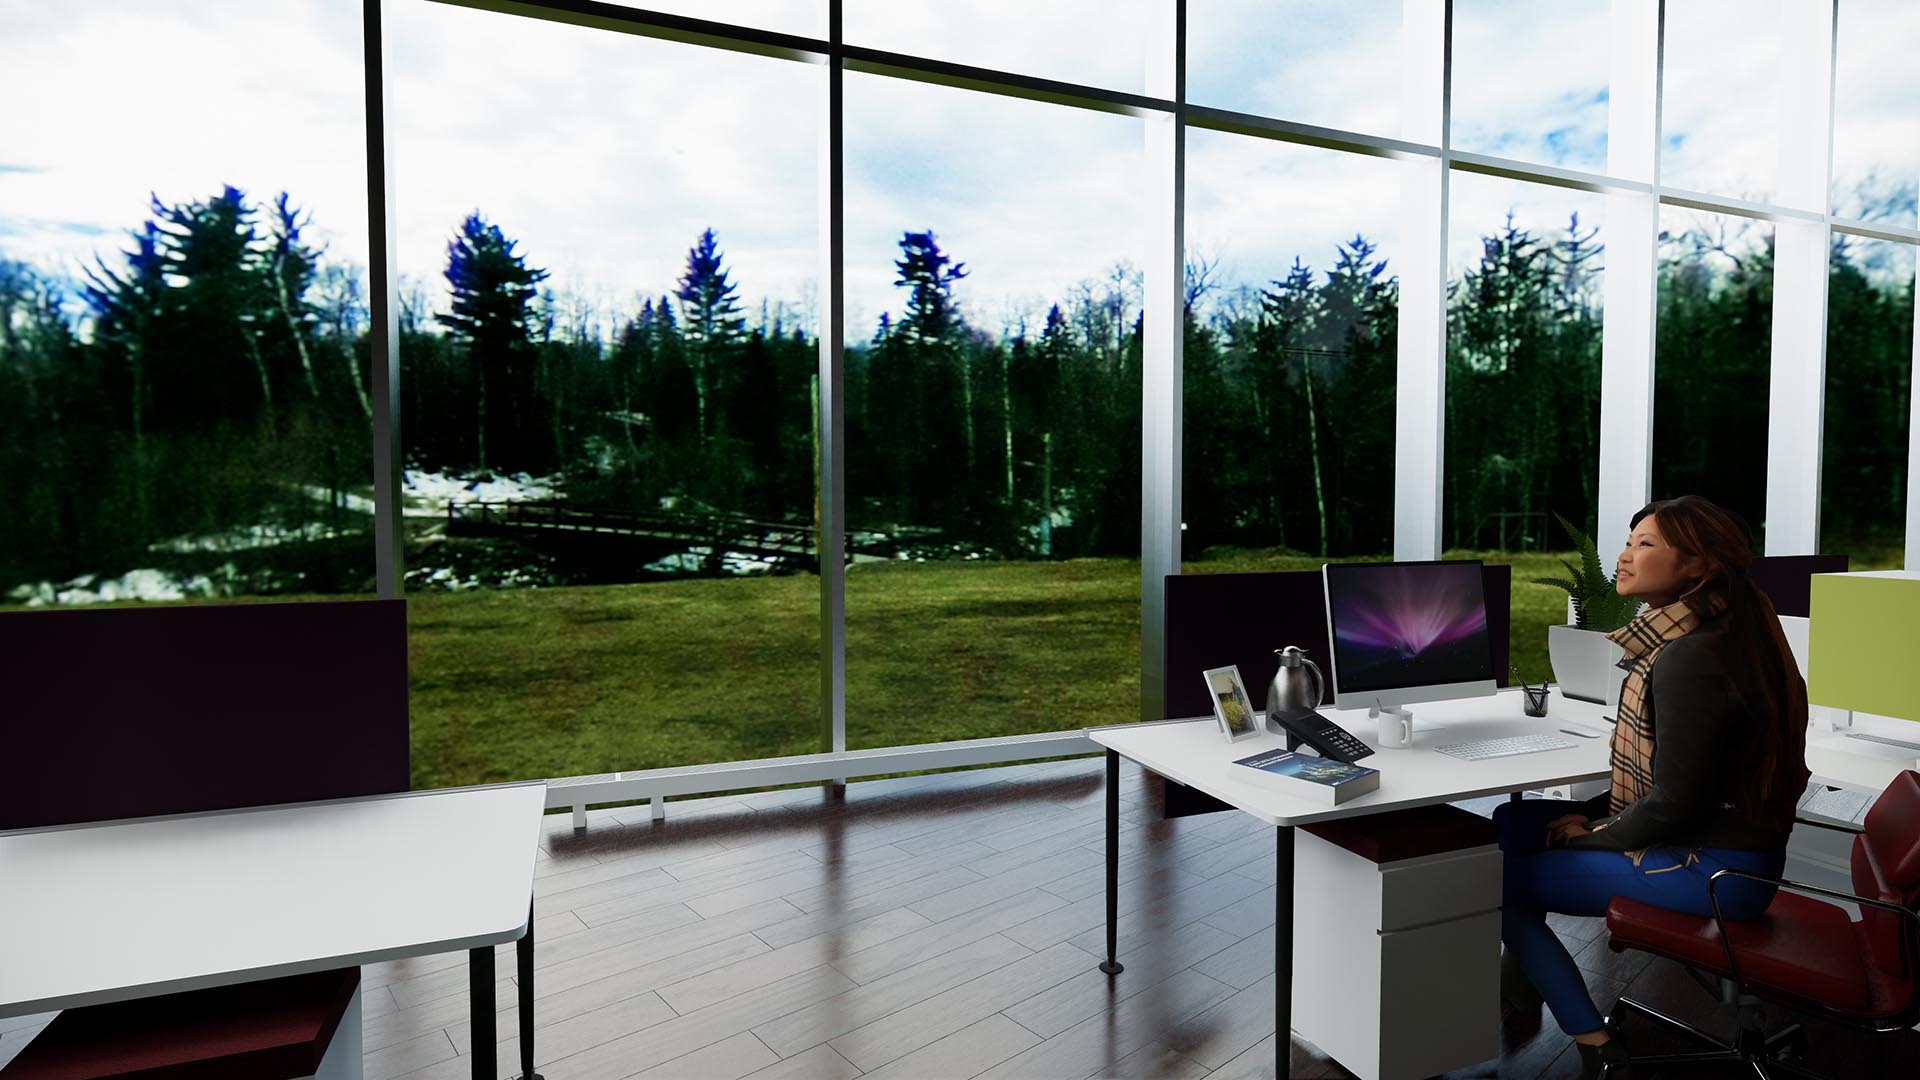
Here is another example from a different location in the proposed design.

Another Example with Custom Skybox
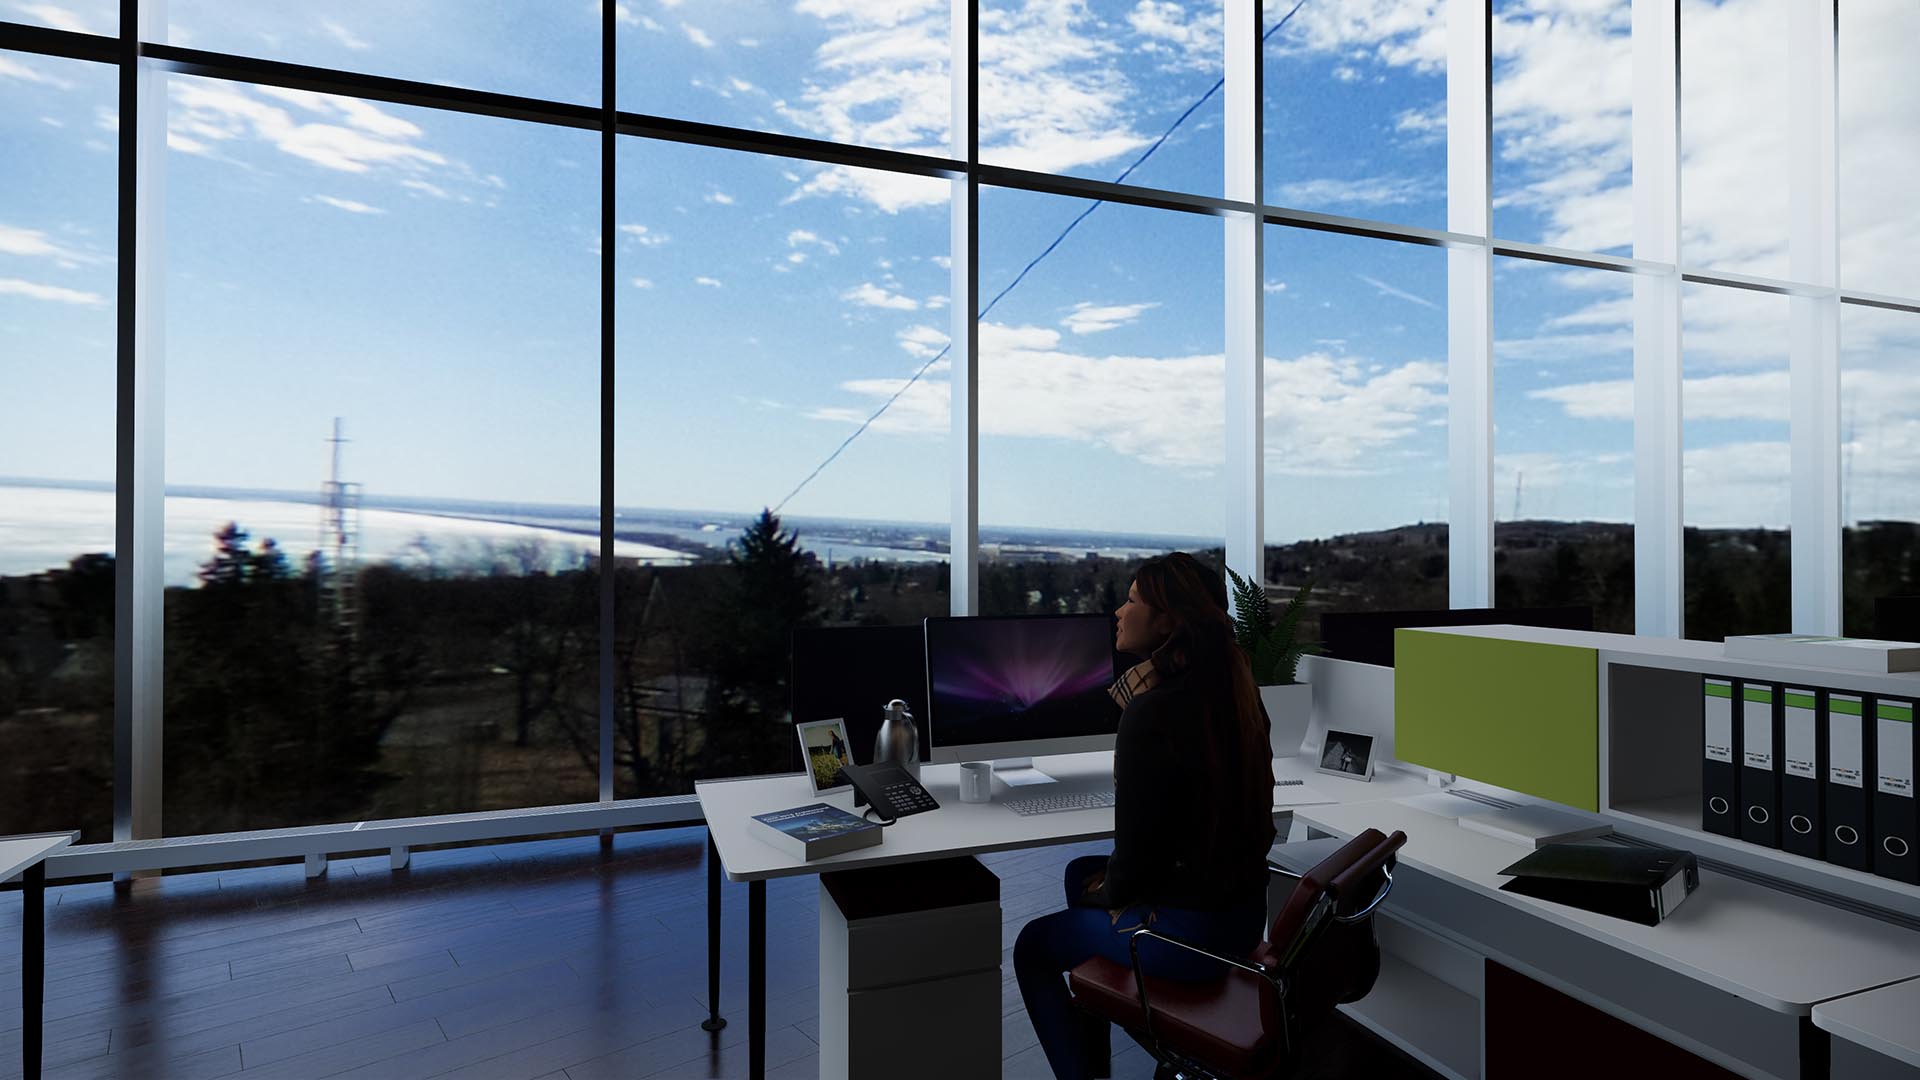
Again, notice the reflections of the real-world environment on multiple surfaces: floor, table and image on wall. So cool! It is hard to achieve this effectively in post processing.

Custom Skybox Reflections in Multiple Locations

Adjust Skybox Brightness
Another helpful setting related to the Skybox is Brightness, as pointed out in the image below. Its effects are shown in the following real-time rendered image.
If the time of day is set to early morning or late evening, the skybox brightness setting can be reduced to make it look more accurate. Otherwise it would always be the same brightness and detract from the believability of the image.

Skybox Brightness Adjustment Results
Also in the Enscape Setting dialog is the Use Brightest Point as Sun Direction option. This will automatically reposition the sun, so it casts shadows that match the photo! Speaking of lighting, it is also interesting to note that skyboxes are emitting a little bit of light, but cannot offer IBL (image based lighting) as with HDR datasets.

Another Skybox Brightness Adjustment Example
Here are a few more examples, all from images I took in a single Saturday morning trip!

Additional Examples; Adjacent Property
Yes, those are really mid-April ice chunks in Lake Superior! The lake never really fully freezes over in winter, but when it is -30F some areas do freeze and it then takes a while for them to melt; the year-round average water temperature is 39 F (4 C) degrees!

Additional Examples; Waterfront

More reflections…

Additional Examples; Exterior with Reflections

Additional Examples; Exterior with Reflections
For more on this topic, and where to get free skybox files, be sure to check out this Enscape Help page: Skybox as a Background
CONCLUSION
It is easy to see how much more realistic your renderings can be in still images, real-time and VR. Give it a try and share your results!
Please get in touch via twitter @enscape3d and @DanStine_MN .

Dan Stine
He is an Author, Blogger, Educator,
BIM Administrator and Wisconsin registered architect.
He works full-time at LHB - a 250 person full-service design firm.
He is an Author, Blogger, Educator,
BIM Administrator and Wisconsin registered architect.
He works full-time at LHB - a 250 person full-service design firm.
LinkedIn - https://www.linkedin.com/in/danstinemn