Best Practices: Video Creation in Enscape
When navigating a model in real-time is not practical, or you want a pre-scripted path that aligns with your talking points, then creating a video is the solution. For example, I recently worked in my firm’s booth in the exhibit hall at a regional conference to promote our design services. We have a large flat screen television, on a floor stand, which was used to play a continuously looped Enscape-generated video (straight off a USB drive plugged directly into the TV). This eye-catching medium proved to be very engaging and prompted several questions, thus serving its purpose to engage attendees in a meaningful conversation about the work we do.
This article will cover the powerful video creation features and workflows found within the Enscape plugin. Enscape has a great, recently improved workflow for developing a video. I will be using Autodesk Revit, but the way in which this functionality was implemented into Enscape allows it to work the same in SketchUp, Rhino and ArchiCAD as well. If you’re not an Enscape user yet, sign up for the free trial.
Overview about the best practices for Video Creation:
1. The Big Picture
2. Video Editor – Creating a Path
3. Keyframe Editor – Editing the Path
4. Quick Feature Overview
5. Save and Load a Path
6. Export Settings
7. Export Video
8. Conclusion
1. The Big Picture

Enscape’s Video Commands | Enscape Keyframes and Path
In the editor shown below you can add your different keyframes (step “A”). In addition to morphing the view direction, keyframes allow other options such as time of day (step “B”). The duration between keyframes can be adjusted by setting an explicit timestamp.
Enscape’s Video and Keyframe Editors
To finish the “big picture” overview: once the path is defined the video may be previewed in Enscape using the Preview Video command. If everything looks good, then use the Export Video command to make an MP4 which can be hosted online or shared.
2. Video Editor - Creating the Path
The Video Editor also has options to delete all keyframes and to control camera movement; Shaky camera and Easing in/out. I like the latter option, which starts and finishes the video at a nice slower speed along the camera path. The Shaky camera option simulates the natural movement noticeable when recording a video with a handheld camcorder, which might be used for an informal presentation.
Tip: Be sure to save your path before closing Enscape, otherwise it will be lost.
Enscape’s Video Editor
3. Keyframe Editor - Editing the path
The path may need to be modified to adjust the view direction or avoid colliding with objects in the scene. Enscape makes this easy by allowing us to select keyframes and then visually adjust them. This process can be started within the 3D view or via the Timeline in the Video Editor. In the 3D view, hover your cursor over a camera (i.e. a keyframe) until it turns green (see next image) and then click. Notice how the camera path has arrows on it, indicating the direction of travel. Once in the Keyframe Editor, you have several reference lines and controls, as shown next. A keyframe can also be accessed/edited by clicking on the triangles on the Timeline (see image above again).
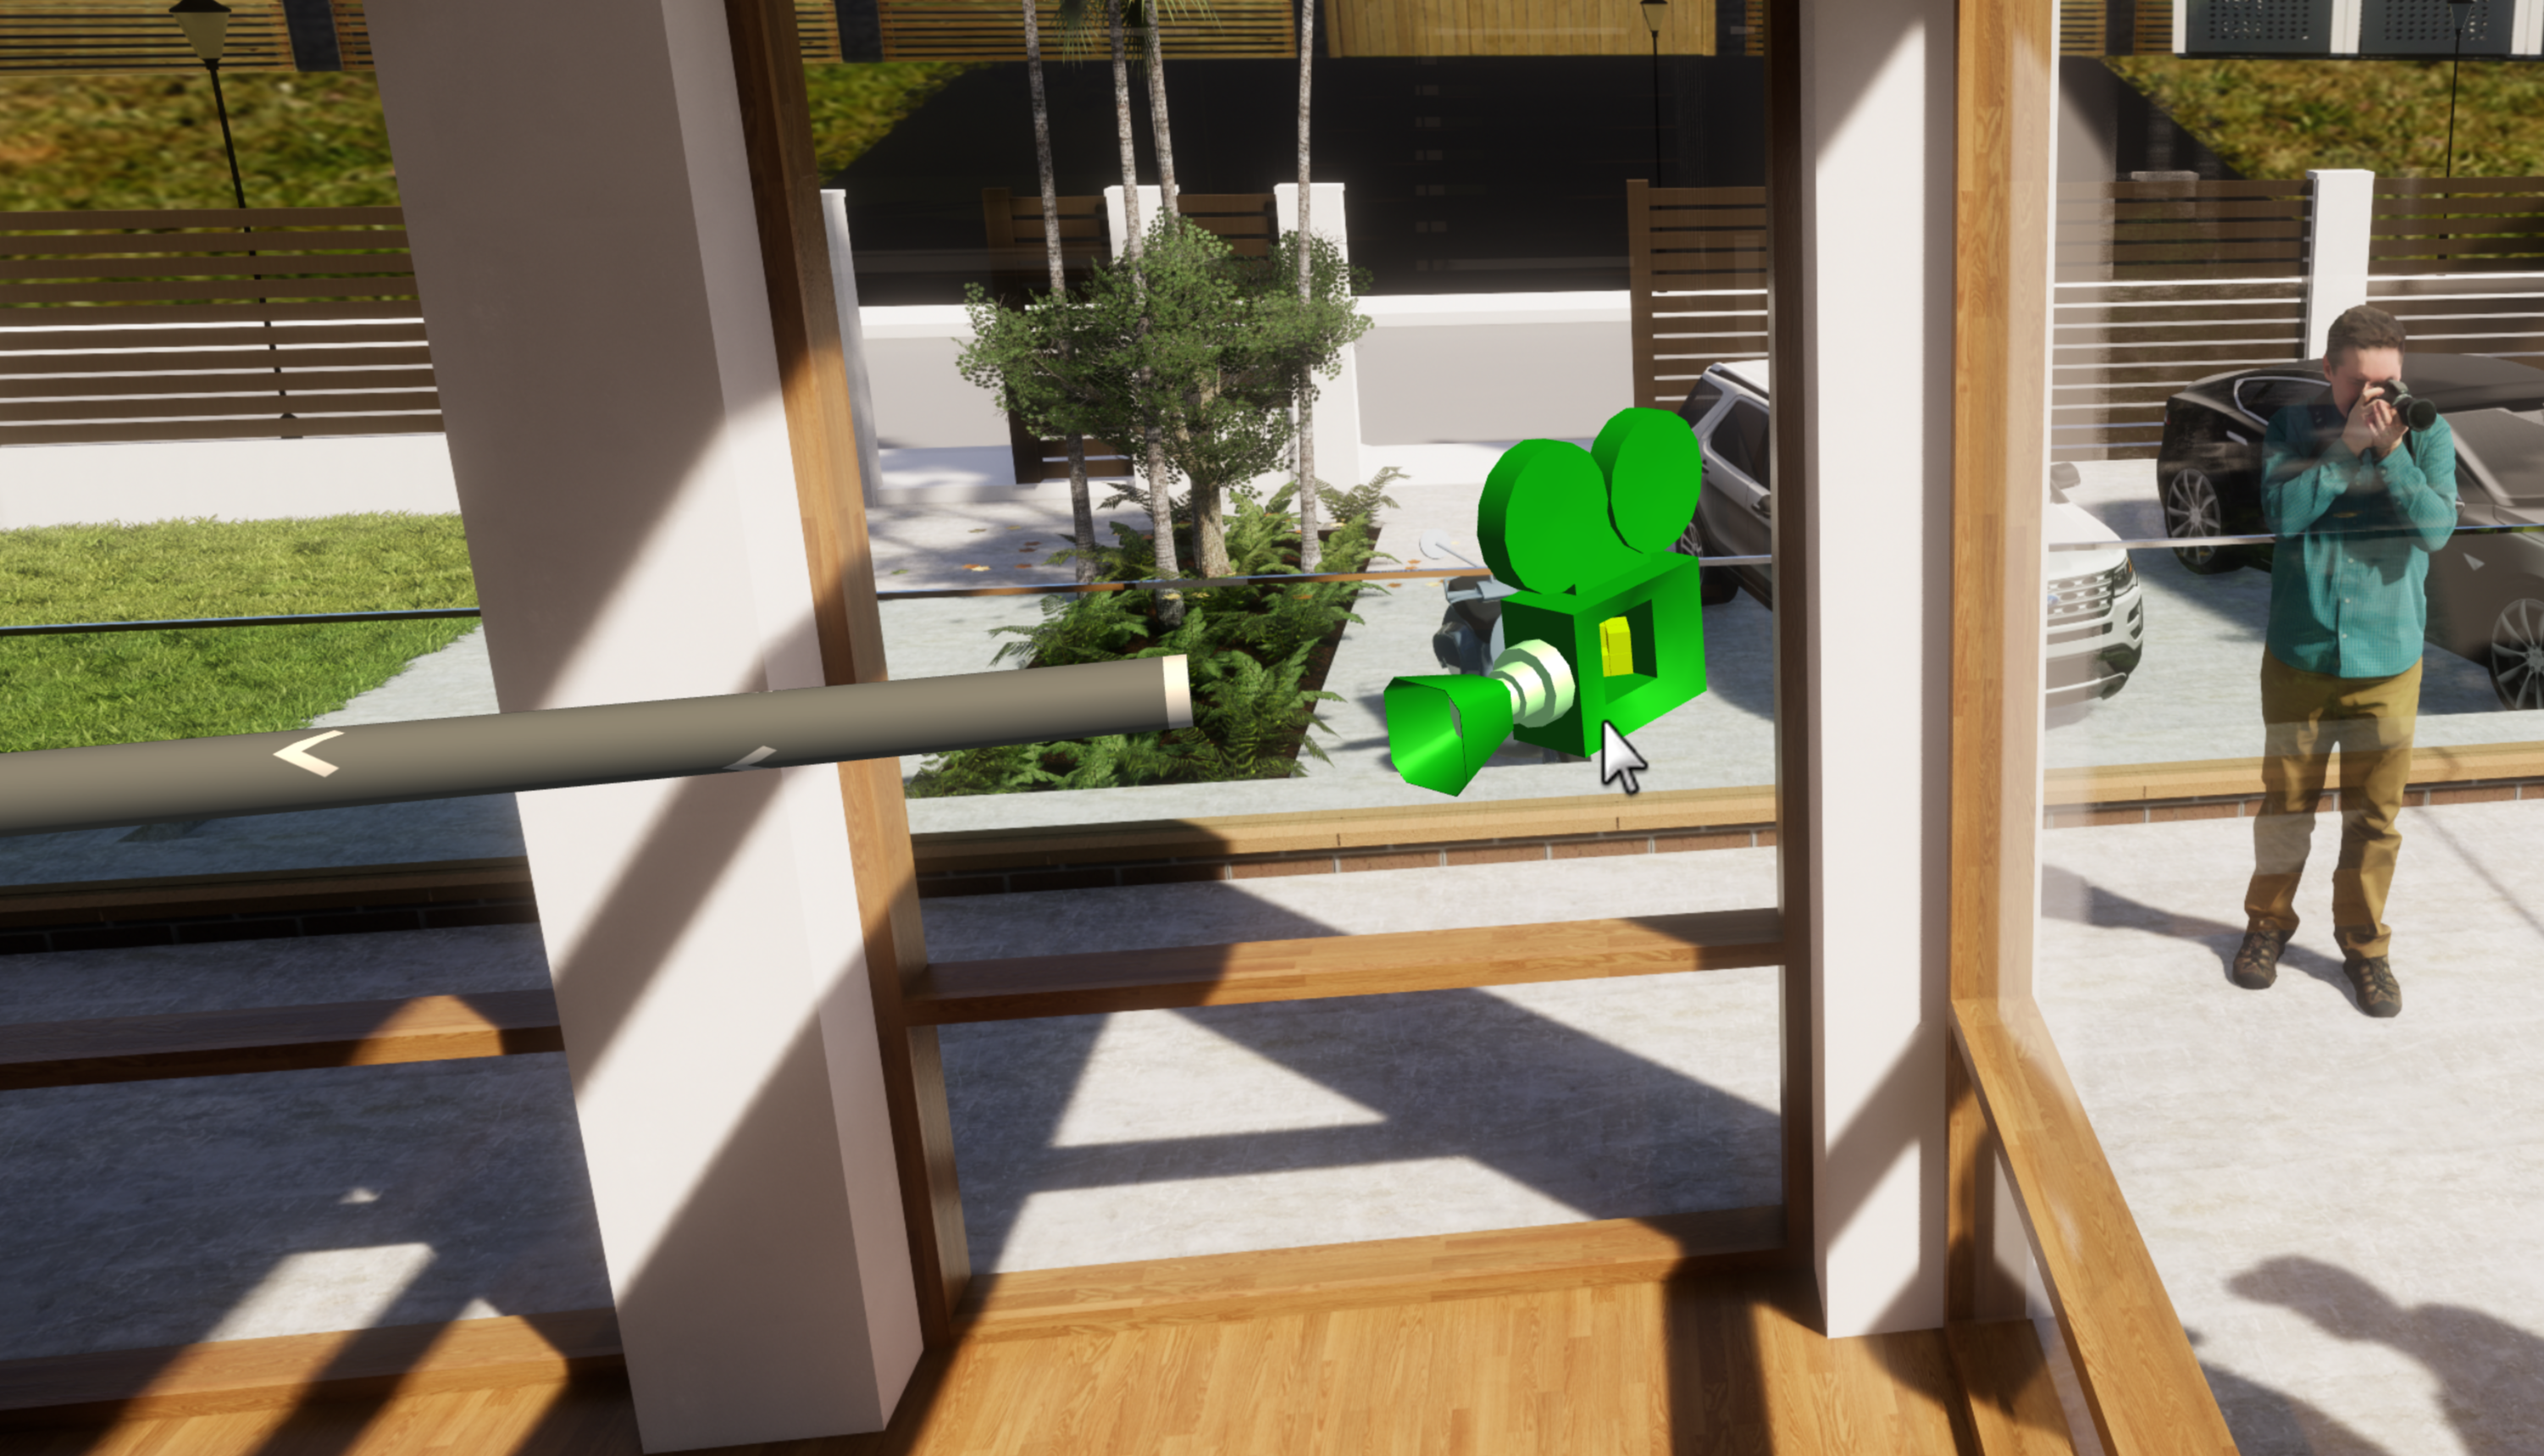
Selecting a Keyframe
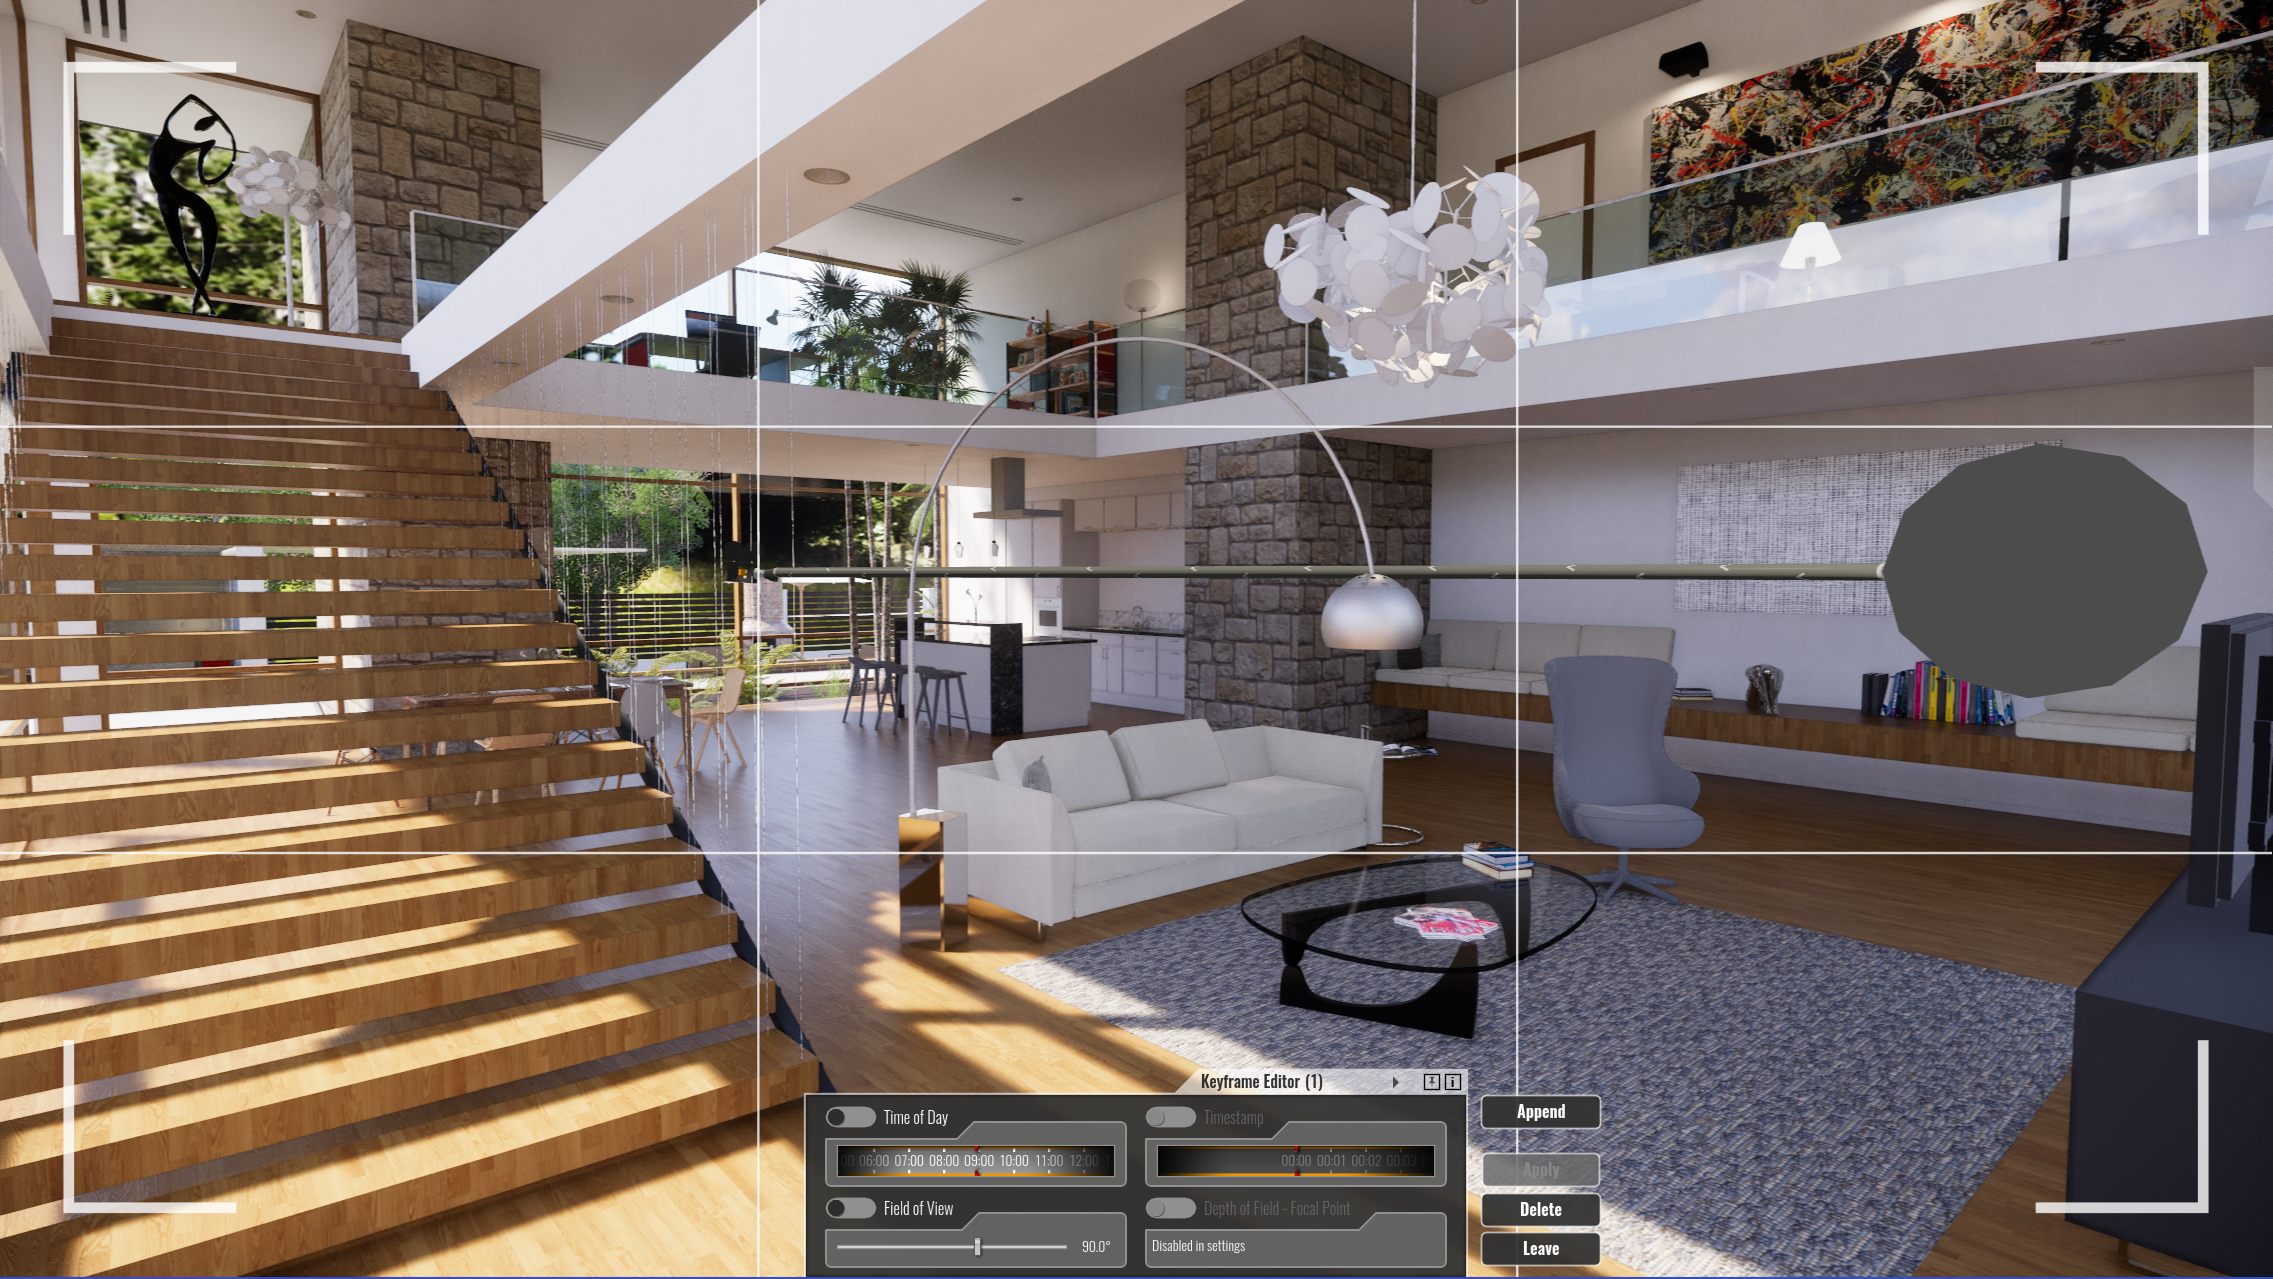
Editing a Keyframe
In this short video, I will show how keyframes can also be inserted graphically on a path just by clicking on it. I demonstrate how to add another keyframe between #2 and #3 so we look straight ahead longer after leaving keyframe #2. I also show how to adjust the camera height, so the video ends with a shot looking down on the kitchen. To do this, simply click on the last keyframe/camera, make the view composition adjustments and then Apply the changes.
Using the controls in the Keyframe Editor, the Time of Day, Field of View, Depth of Field and Timestamp can be overridden from the current settings. For example, if the last keyframe is selected and the timestamp is adjusted, the duration of the entire video is adjusted. Or, if the time of day is adjusted in at least two keyframes, it will morph between these views.

Edit Keyframe Editor
Here is what each of the buttons on the right do:
• Append: Add a new keyframe on the path.
• Apply: Save changes without leaving the edit mode (Edit mode can be left by pressing Enter)
• Delete: Delete this keyframe. (Del)
• Leave: Leave the edit mode without saving changes (Esc)
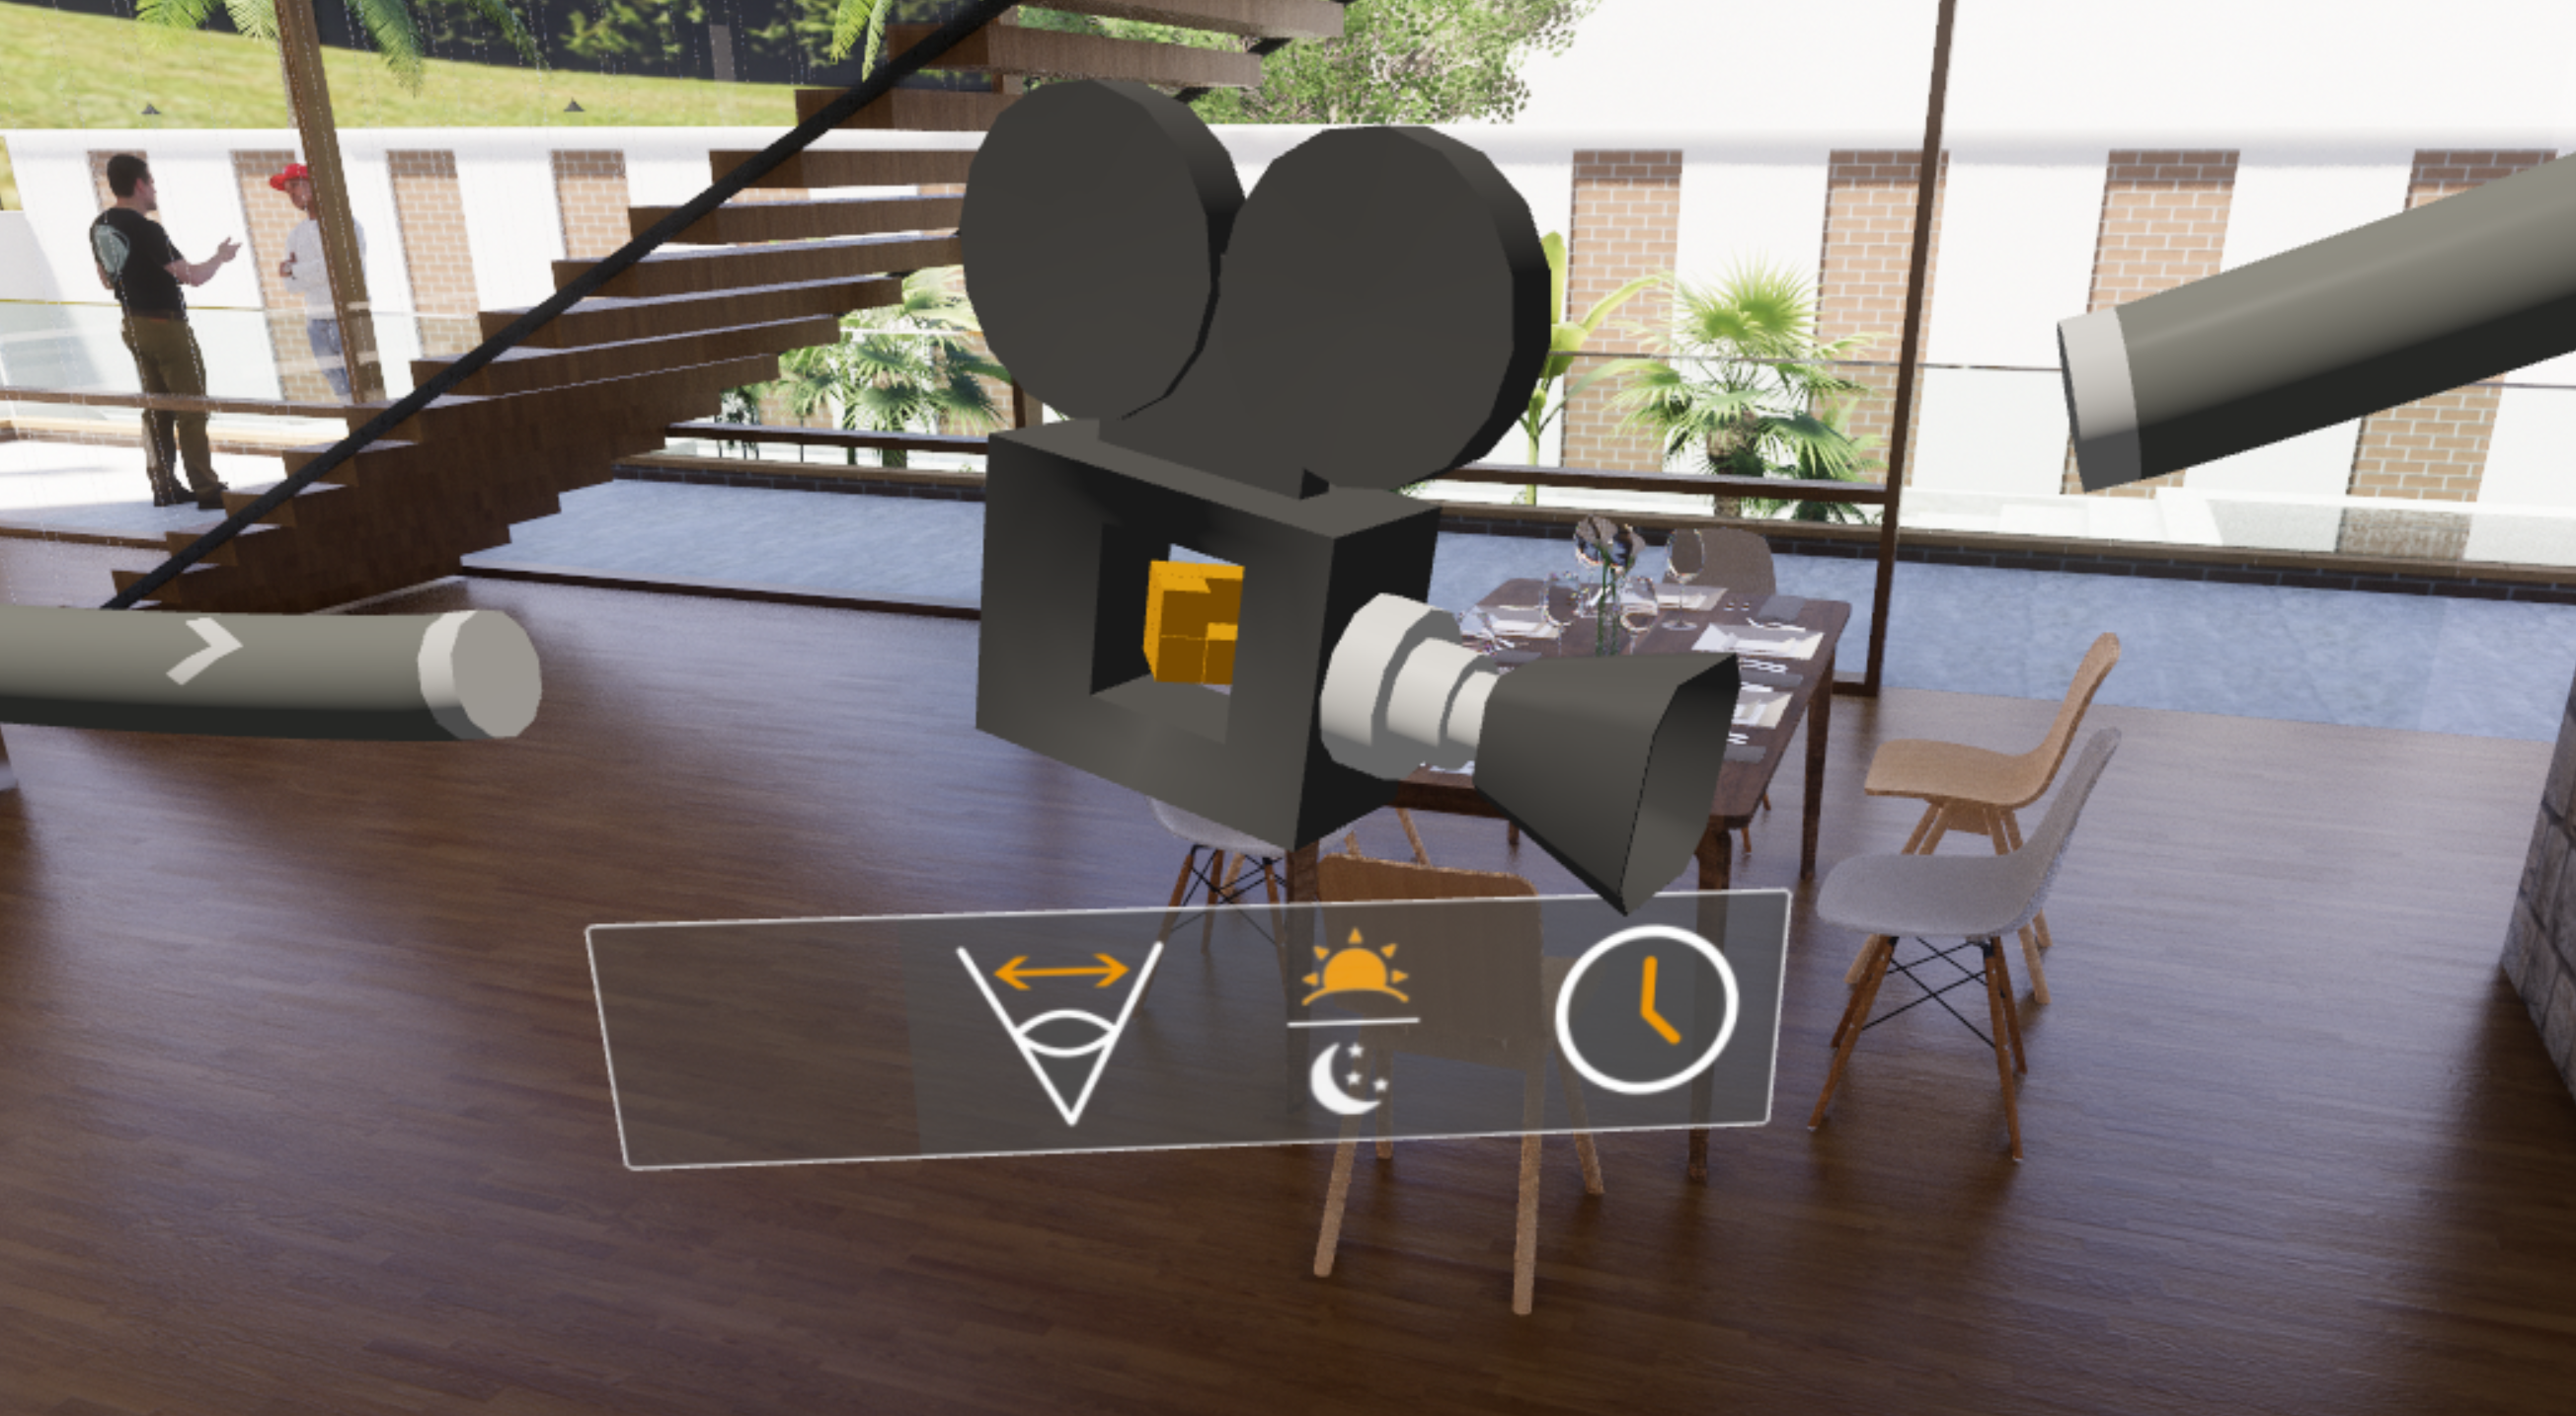
Keyframe shows options applied
When a keyframe option has been overridden, a graphic appears next to each one as a reminder. In the example below, three of the four override options have been applied to this keyframe; field of view, time of day and timestamp.
Field of View(move slider across picture)
Time of Day(move slider across picture)
Depth of Field(move slider across picture)
4. Quick feature overview:
Field of view defines what is visible at a particular position and orientation in space. Chose the angle of the area captured through the camera to influence the atmosphere of your scene.
Set the time of day by choosing the desired hour of day in the editor; the lighting will be changed accordingly. Enhance your project by fine-tuning where the daylight falls in every scene.
Depth of field determines the focal point in your video. You can either use the center of the screen as an automatic focus or set a target distance. Use this feature to increase emphasis on a specific part of the scene. Have a look at more of Enscape’s features right here .
An Enscape video path can also traverse floors as shown in the next two images. The process is the same: compose views along the path and add keyframes.
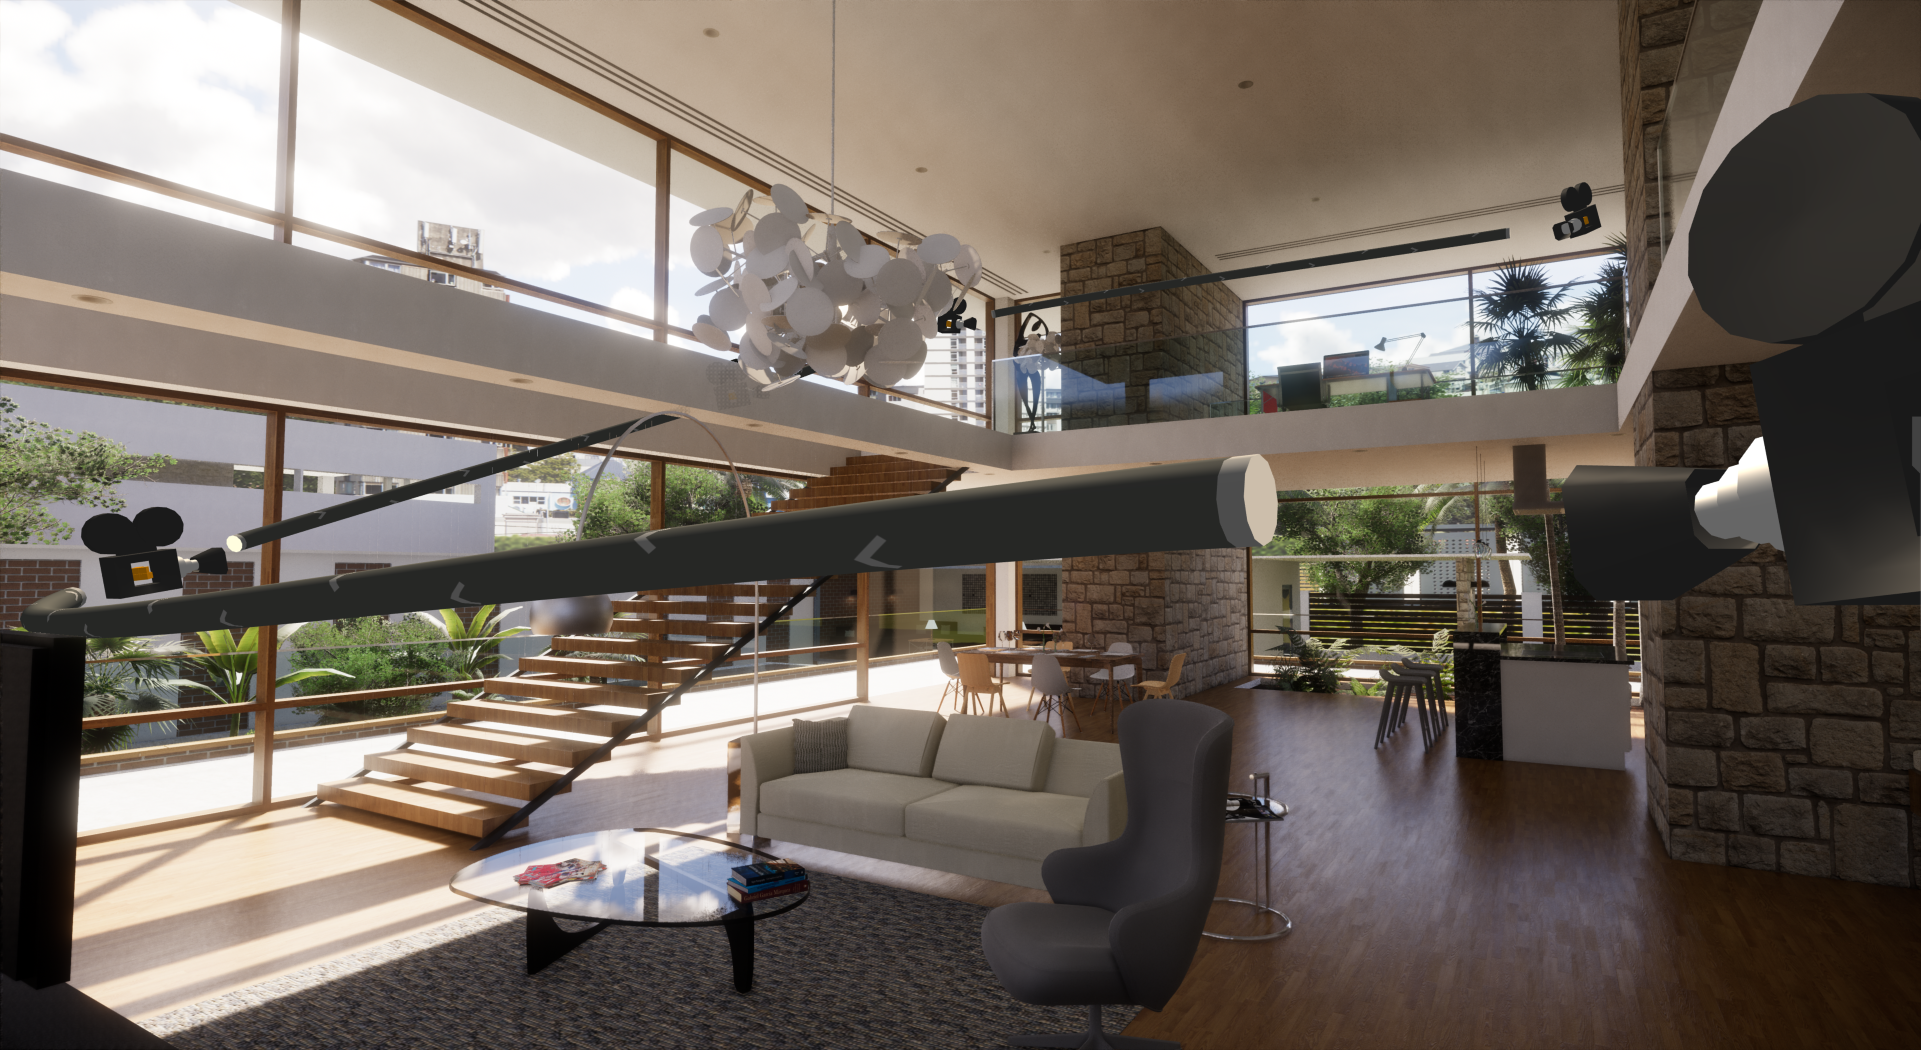
Video Path traveling between Floors
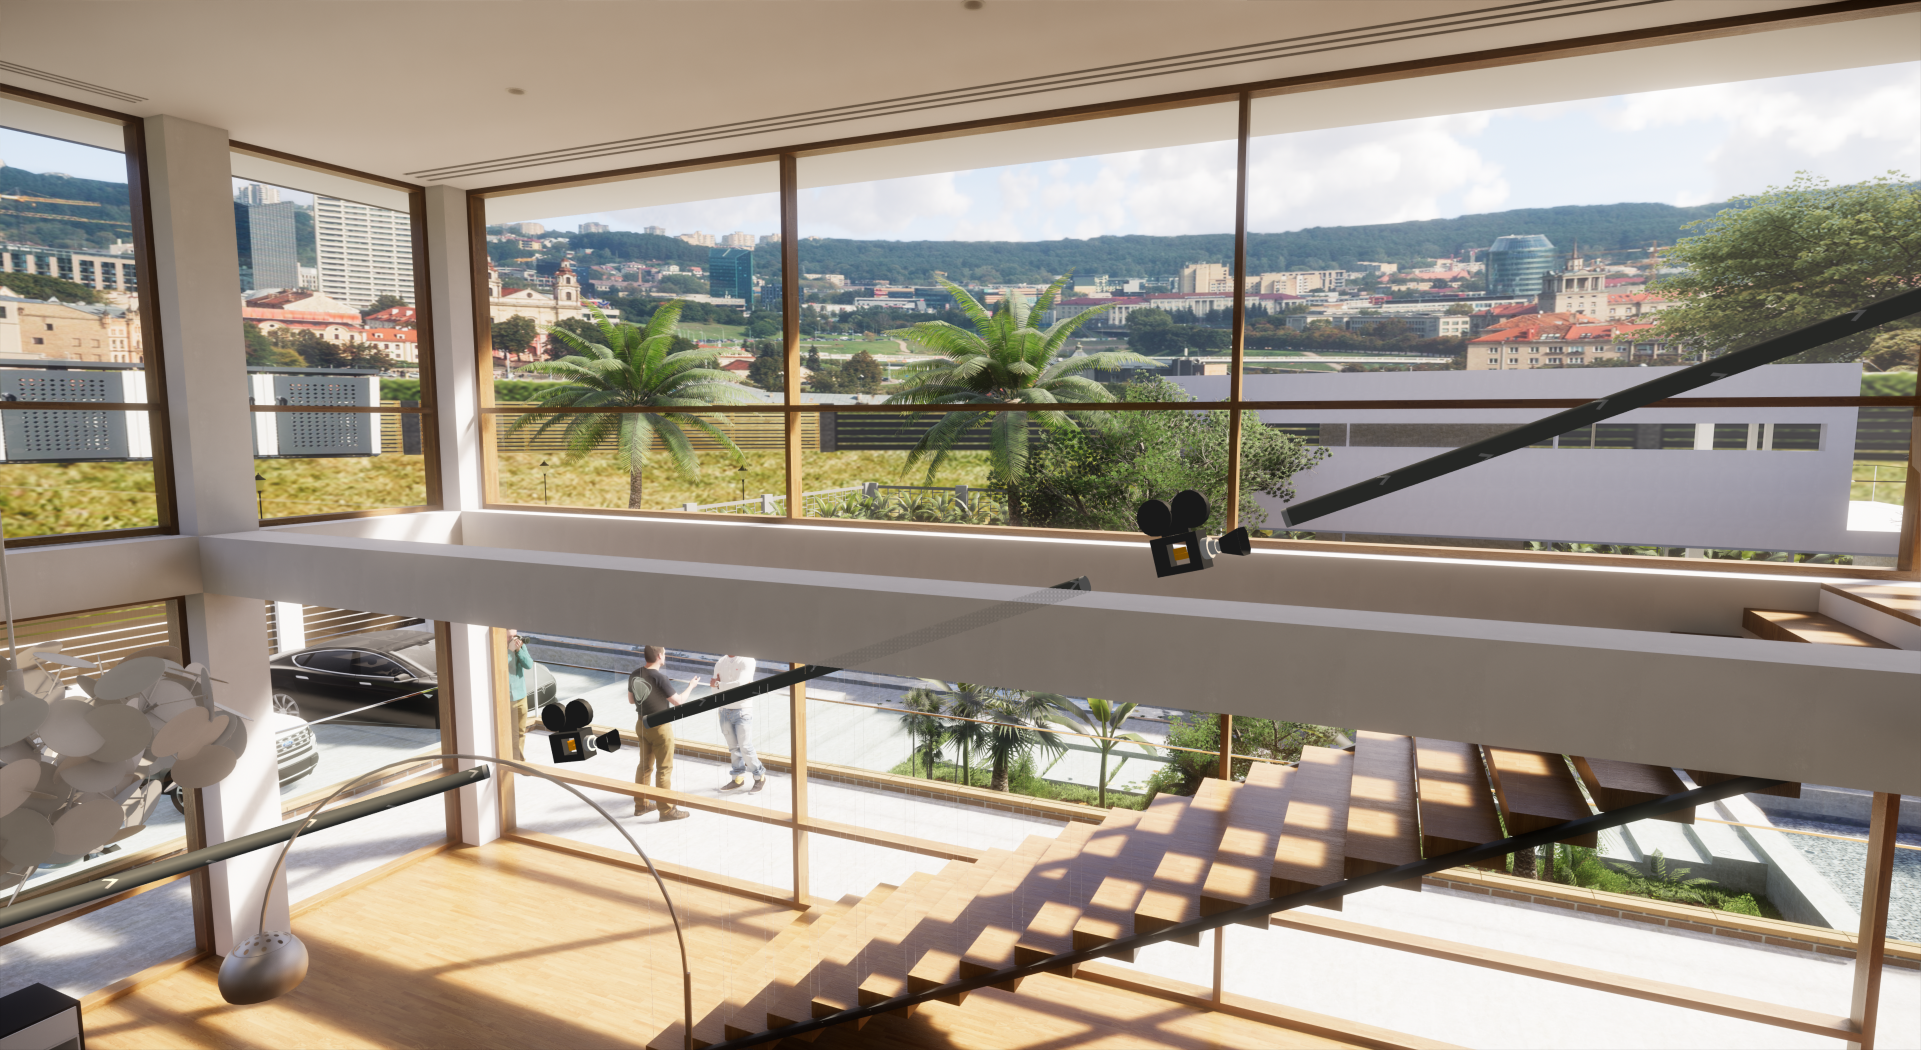
Keyframe added mid-way up the Stairs to better define Path
My first attempt at this path only had a keyframe at the top and bottom of the stair run. However, when smoothing/morphing the path between keyframes, the path curved too much between the bottom and top of the stairs. To correct this, I inserted another keyframe mid-stair to define the path as shown in the right image. Using these features, we have full control over the path and view direction.
The video path editing features allow multiple keyframes on the same position (with different camera rotation or time of day) as well as explicit control over the timing. This means you switch between Enscape and your CAD software less frequently.
5. Save and load a path
If you want to use a path again in the future you can save it using the Save Path command in the primary design application; Revit, SketchUp, Rhino or ArchiCAD. The ability to define multiple paths within the same project is an especially beneficial feature. Save these files in the project folder on the network so the entire design team has access.
The saved file is an XML file. If you edit this file, you will notice each keyframe has an X,Y,Z value for Position and LookAt. These numbers could be modified to make more precise adjustments along the path.
6. Export settings
The quality of the video is dependent on the options specified in the Enscape Settings dialog, shown below. There are a few important things to know:
1. Resolution
Choose the video resolution in pixels. This setting impacts the time needed to generate the video and the resultant file size. If you chose a 1080p resolution, Enscape will render a video with 1920 x 1080 pixels. Note that most televisions and even high-end computers have a difficult time playing video higher than 1080p.
2. Video
• Compression Quality: A higher compression quality increases the file size but reduces compression artifacts in the video. The export time is unaffected by this setting.
• TIP: Setting this all the way to the right, at Lossless, only allows individual image files to be exported. A Maximum or lower setting will create an MP4 when the video is exported.
• Frames Per Second (FPS): Takes proportionally longer to render, but a higher value yields a smoother video.
3. Motion Blur
This setting can be deactivated if rapid camera movements result in a blurred image.
4. Rendering Quality
This setting controls the lighting and reflection quality of Enscape. Higher values yield more photorealistic results, though this increases the render time per frame. Thus, the combination of render quality and capture settings can have a significant impact on the time required and quality of the final product.
Keep in mind, the overall length of the video is determined automatically or by the Timestamp animation feature in the Keyframe Editor as described above. It does not matter where the keyframes are or how many there are.
7. Export video
With the path defined and the settings adjusted, use the Export Video command to create an MP4. As already mentioned, this process can potentially take a significant amount of time. This is largely dependent on your settings (see above), but also determined by the computing power of your hardware . A fast graphics card will improve export times significantly.
These files can be very large. I have created a few recently that were upwards of 2GB for a 20-minute 1080p video. However, the results are worth it!
Here are some examples of videos created in Enscape without the use of an additional video editing software:
8. Conclusion
In today’s busy and complex world, we need tools that are both powerful and easy to use. As you have seen, Enscape makes the whole process of developing and editing a video just that – easy. The ability to create multiple paths and save each one to be individually reloaded later increases efficiency. And, that this process works the same across multiple authoring tools (Revit, SketchUp, ArchiCAD and Rhino) is just ingenious in my opinion. We may not be able to agree on the best modeling tool, but Enscape is making it hard to not pick them as the go-to visualization solution for the office.
Videos are an effective tool for conveying design intent in our industry. For our clients, many of whom are spending millions of dollars, seeing a high-quality video can be comforting and affirming, because we can all relate to the natural sense of motion in our 3D world that videos afford. These videos can also become a powerful marketing tool for both the design firm and the client. We can use these videos to impress potential clients with our design and technological capabilities. Plus, clients can use the videos on their website or in their own presentations to engage shareholders, investors or their customers. Many readers probably already know all of this, but I wanted to make this closing statement to help bring out the strong value proposition Enscape has for our industry.

Dan Stine
He is an Author, Blogger, Educator,
BIM Administrator and Wisconsin registered architect.
He works full-time at LHB – a 250 person full-service design firm.
He is an Author, Blogger, Educator,
BIM Administrator and Wisconsin registered architect.
He works full-time at LHB – a 250 person full-service design firm.
LinkedIn – https://www.linkedin.com/in/danstinemn


